Configuring Syteca Integration with Okta SSO
Table of Contents
1. Prerequisites
To set up Okta SSO (Single Sign-On) authentication so as to integrate it for use with Syteca, OpenSSL first needs to be installed.
2. Installing OpenSSL
To install OpenSSL, do the following:
1. Open the Windows command prompt or Linux terminal.
2. Generate a self-signed x509 certificate (to be imported into Okta) and a pkcs12 certificate (to be imported into Syteca).
user:/mnt/c/dev/okta_sso$ openssl req -x509 -nodes -days 365 -newkey rsa:1024 -keyout cert.pem -out cert.pem |
3. Configuring Okta
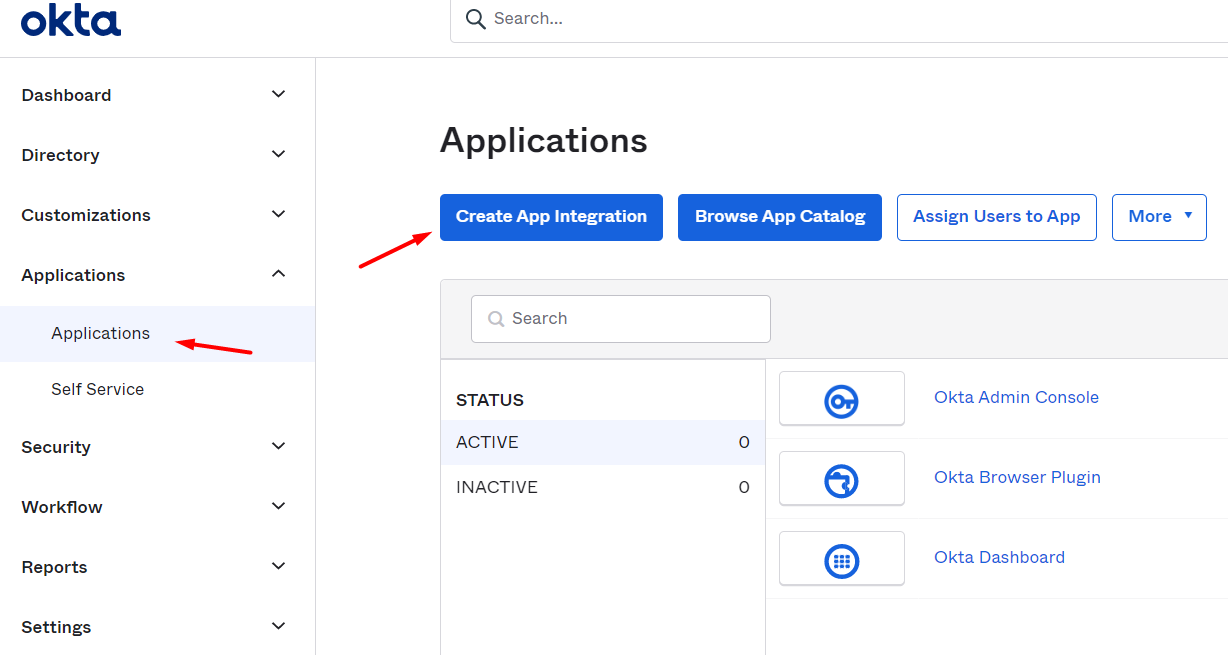
1. Open the Applications > Application section, and click Create App Integration.
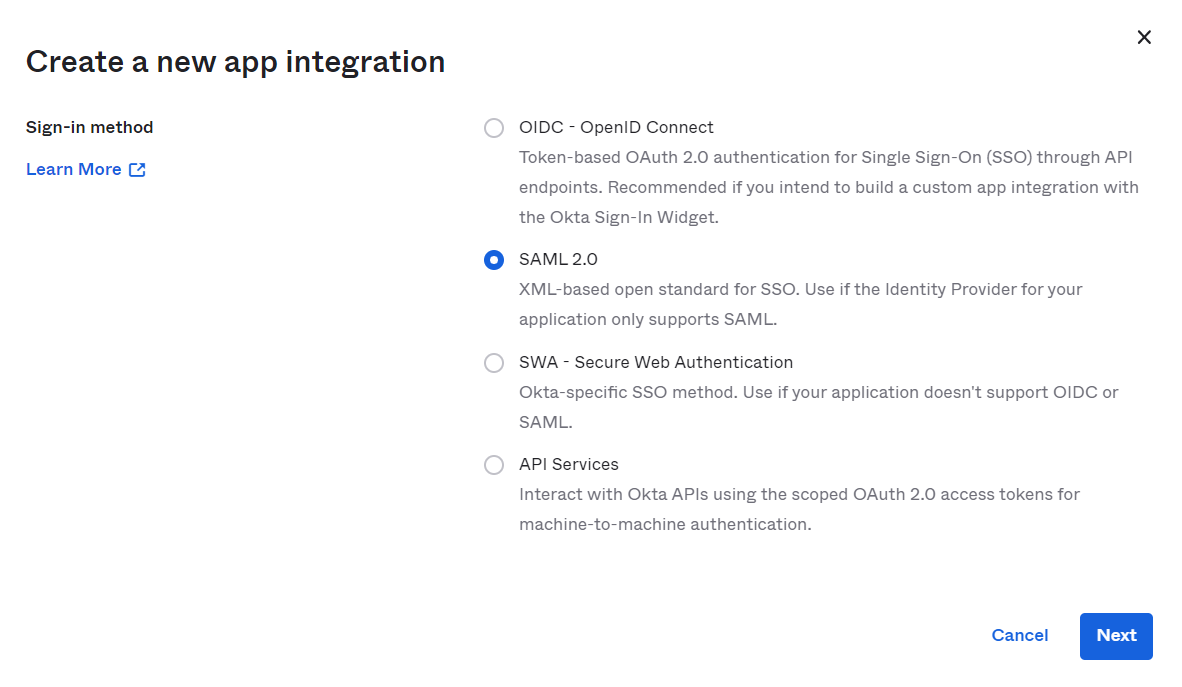
2. In the pop-up window that opens, select the SAML 2.0 option, and then click Next.
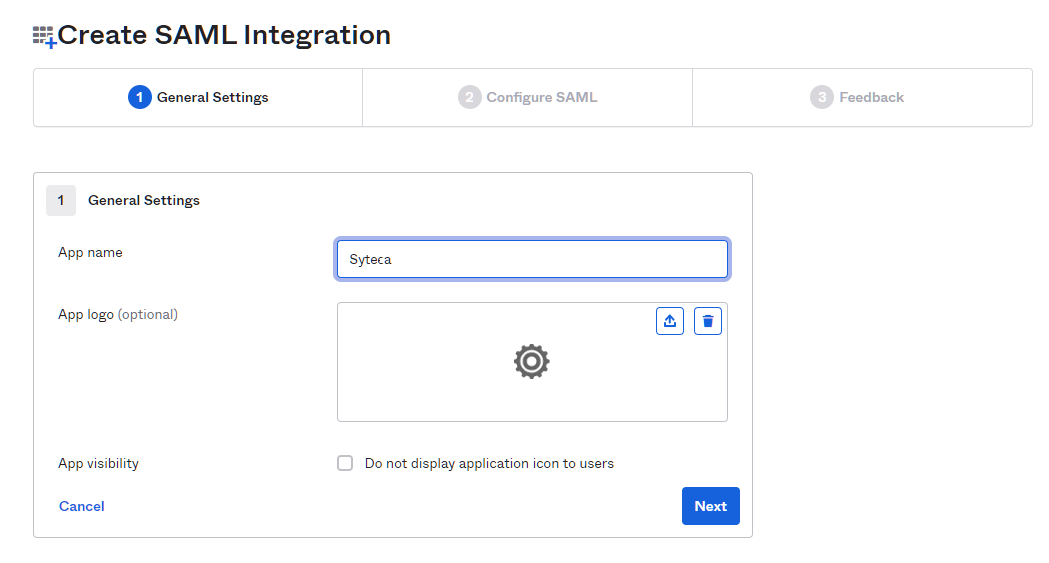
3. On the General Settings page, fill out the App name field with a name for the application, and then click Next.
4. On the Configure SAML page, fill out the Single sign on URL and Audience URI (SP Entity ID) fields (i.e. replace the example "https://terminal/Syteca/" part of the URL shown in the screenshot below, with the URL of your Management Tool in both fields).

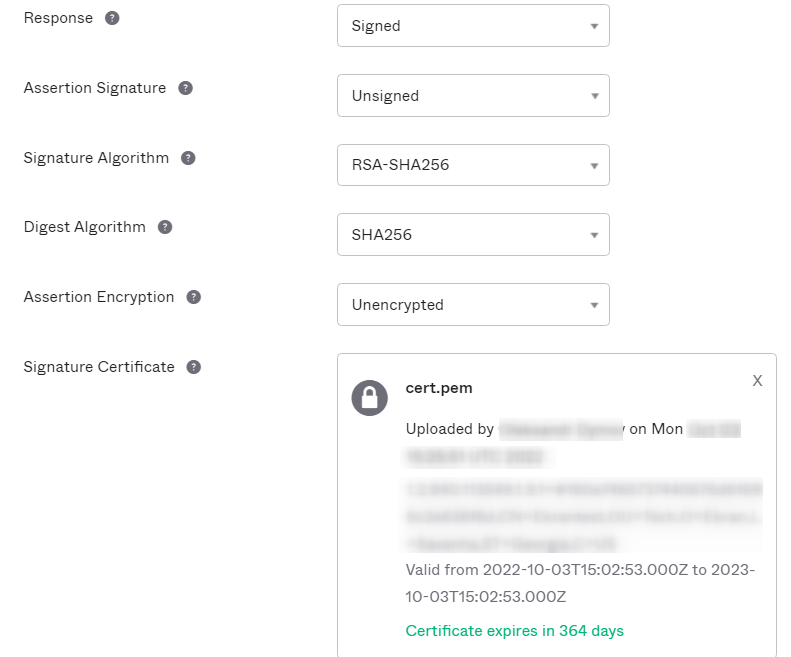
5. Then click on Show Advanced Settings and configure the following (as shown in the screenshots below).
a) Upload your x509 certificate in the Signature Certificate field.
b) Replace the example "https://terminal/Syteca/" part of the URL (shown in the screenshot below) with the URL of your Management Tool in the Single Logout URL field.
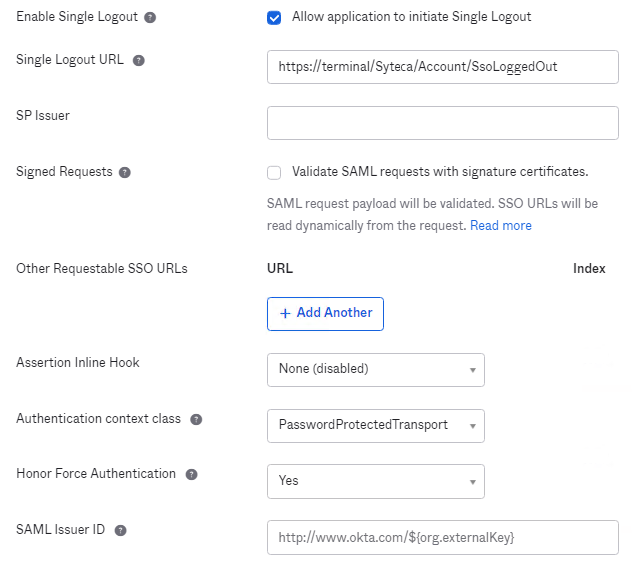
c) Click Next to apply the changes.
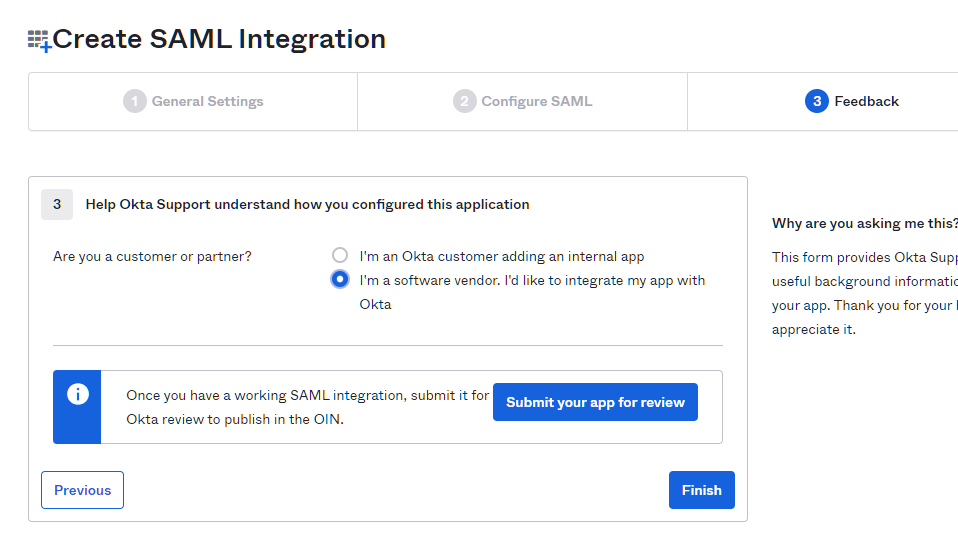
6. On the Feedback page, select the “I’m a software vendor. I'd like…” option as displayed in the screenshot below, and then click Finish to apply the changes.
7. After finalizing configuration of the SAML integration, scroll down to the SAML Signing Certificates section (on the Applications > Application > <your application> > Sign On page), and then click the Action button next to SHA-2, and select View IdP metadata in the drop-down list.

8. Save the information that is then displayed in the new browser tab that opens (e.g. either by pressing Ctrl+S, or by opening your browser options, and selecting the More Tools > Save page as… option (in the Chrome browser) to download the metadata.xml file.
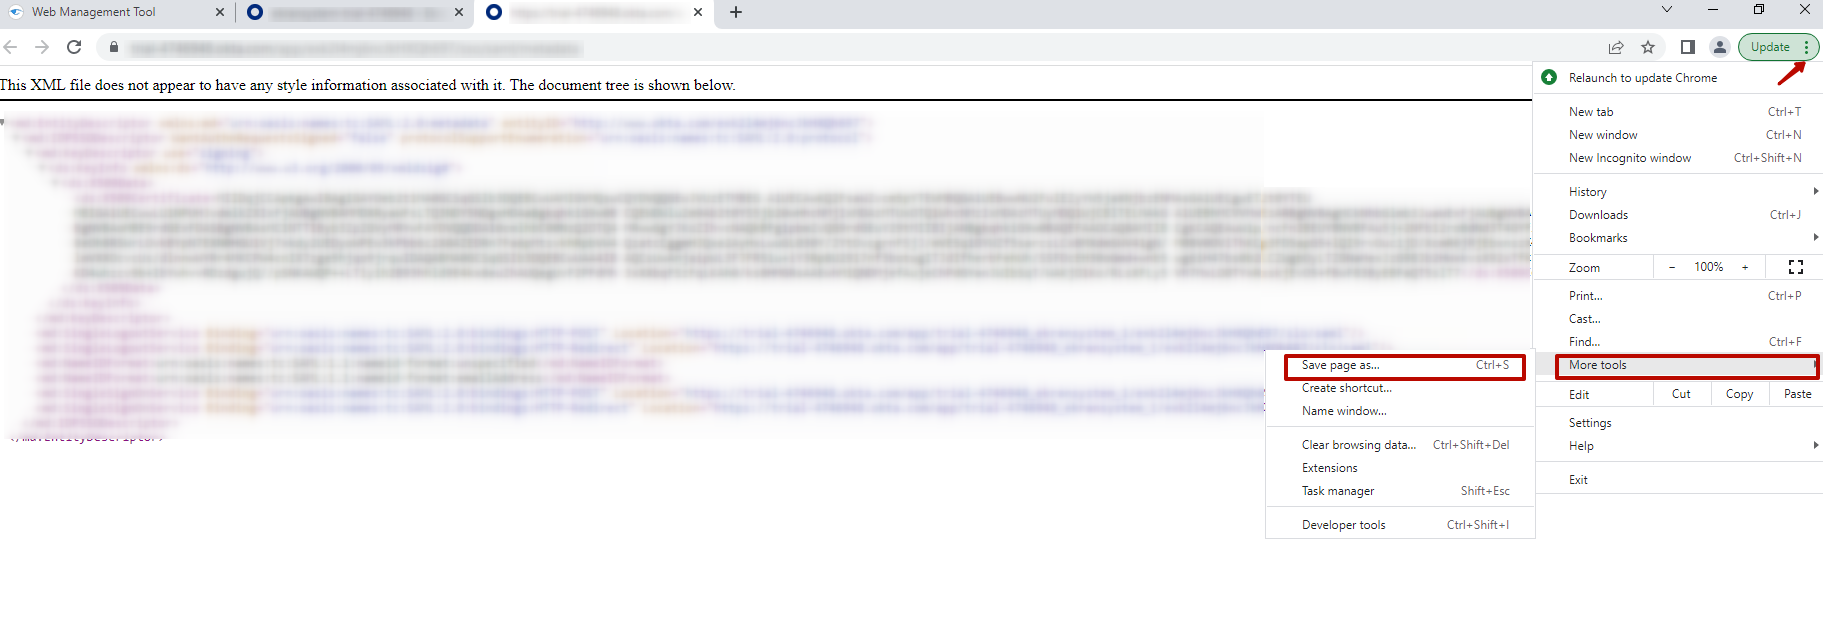
NOTE: You can close the browser tab after downloading the metadata.xml file.
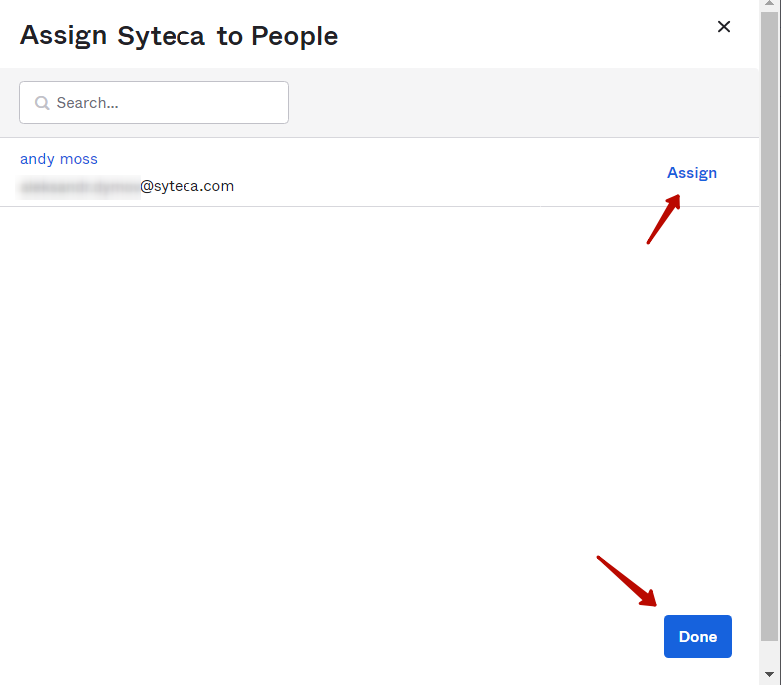
9. On the previous page, scroll up and open the Assignments page (by clicking Applications > Application > <your application> > Assignments).
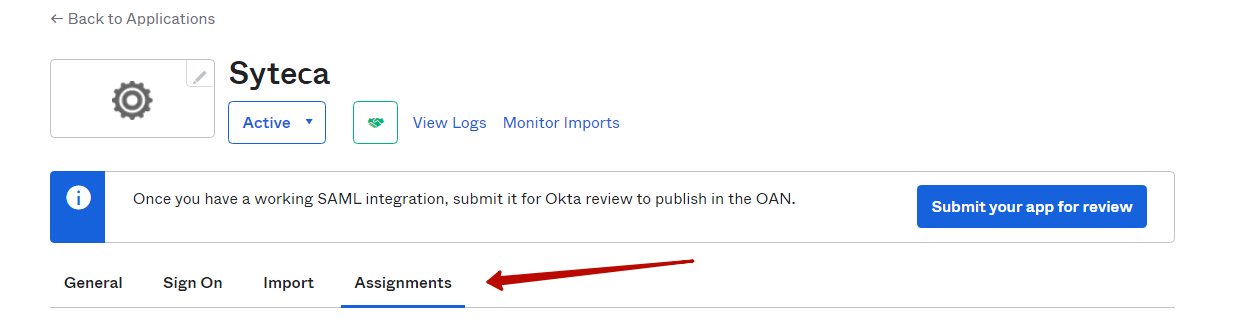
10. Then select the Assign > Assign to People option, and assign a user to this application, and then click Done to apply the changes.
4. Configuring the Management Tool
1. Log in to the Syteca Management Tool, and click the Configuration (
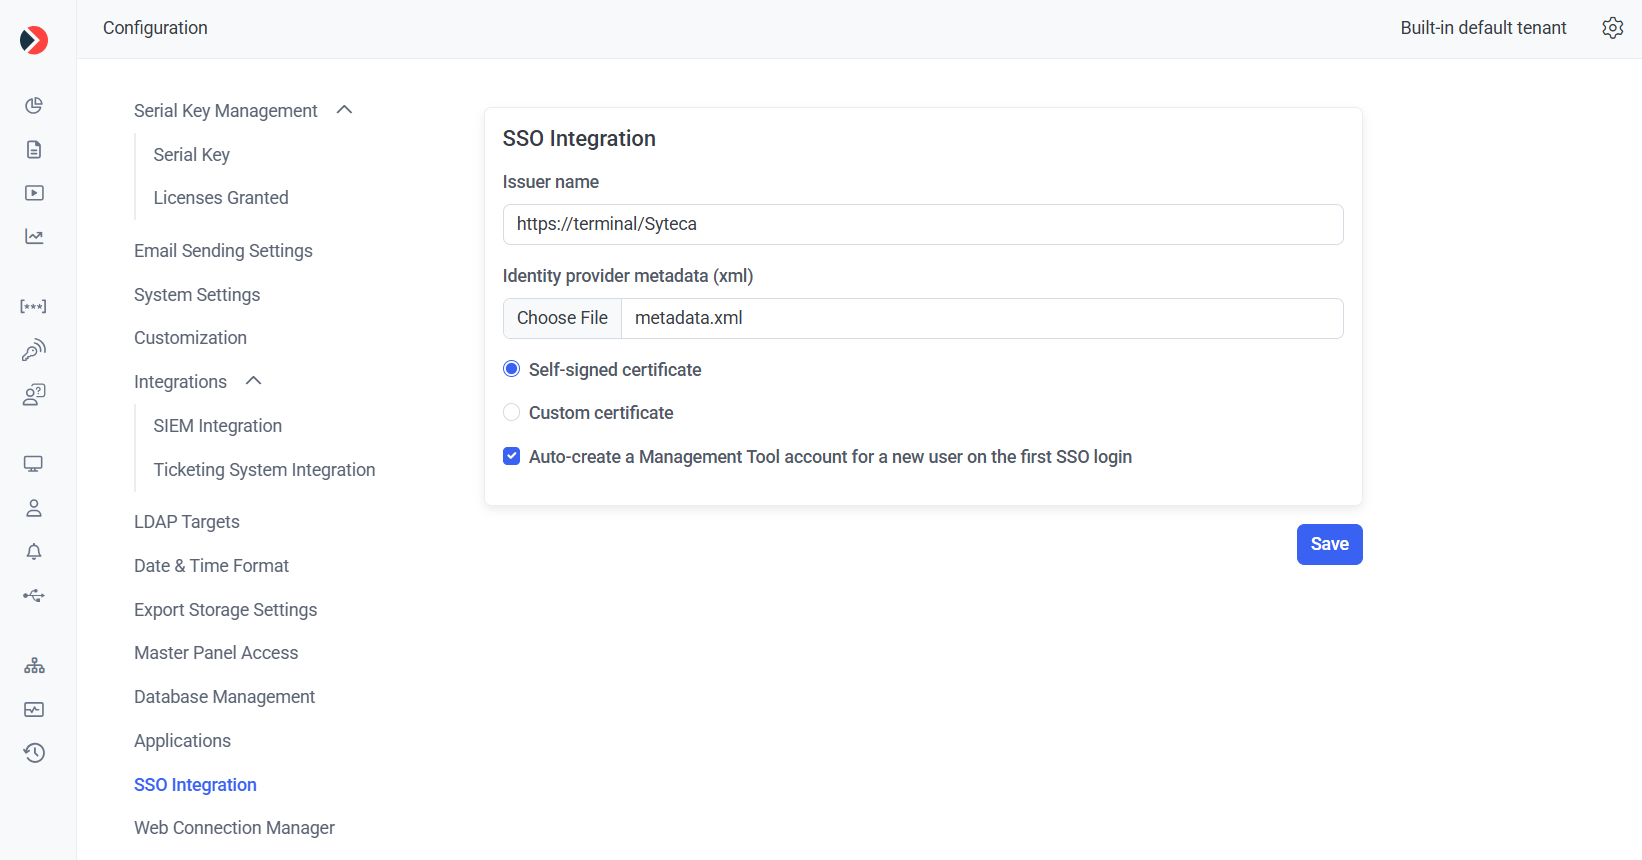
2. Configure the following options:
• Issuer name: Enter your Management Tool URL.
• Identity provider metadata (xml): Click Choose File, and select the metadata.xml file.
• Select the Custom certificate option, click Choose File, and upload your cert.pfx certificate, and then enter the Certificate password.
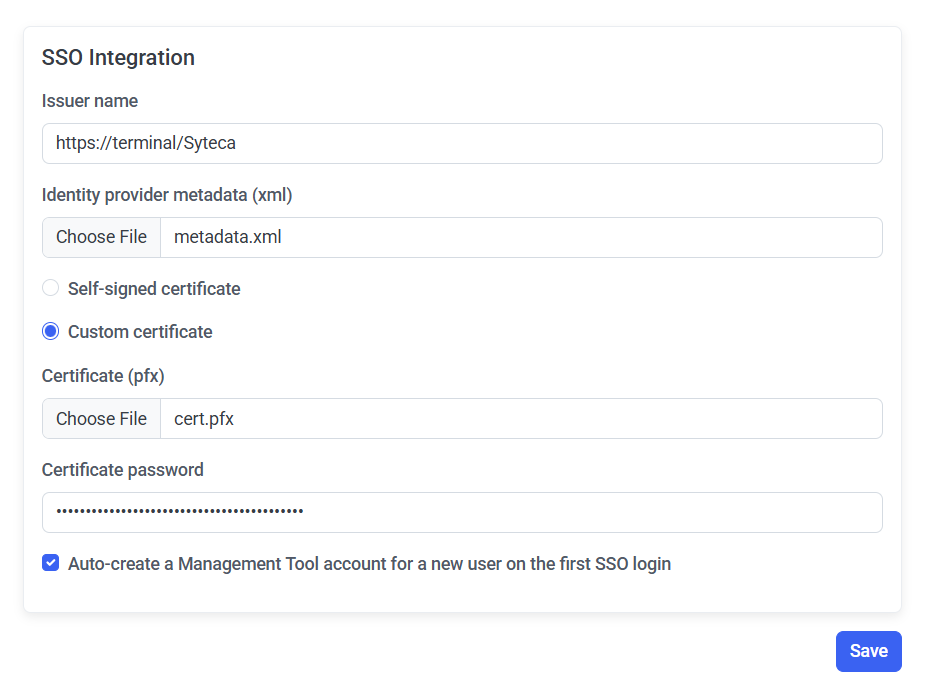
3. The Auto-create a Management Tool account for a new user on the first SSO login checkbox is selected by default, which automatically creates an internal / Active Directory user account in the Management Tool on a user's first login using SSO authentication if the user has not previously been added to the Management Tool, thereby enabling them to log in. This checkbox can be deselected, so that users who have not previously been added to the Management Tool are not added automatically, and are not therefore able to log in.
NOTE: Independently of whether this checkbox is selected or not, Active Directory users who have not been specifically added to the Management Tool as separate users, but who belong to an Active Directory group previously added, can log in (with a new Active Directory user account not created automatically if this checkbox is selected).
NOTE: SSO authentication is not currently implemented for use in Multi-Tenant mode.
4. Click Save to apply the changes.
5. Restart the EkranServer service in Services.