Installing Windows Clients Remotely
NOT AVAILABLE IN SAAS
When all computers for Windows Client installation have been selected, you are ready to start installation. Please first make sure that all the selected computers are correctly configured.
To install Windows Clients remotely, do the following:
1. On the Computers without Clients page, click Install (at the bottom of the page).
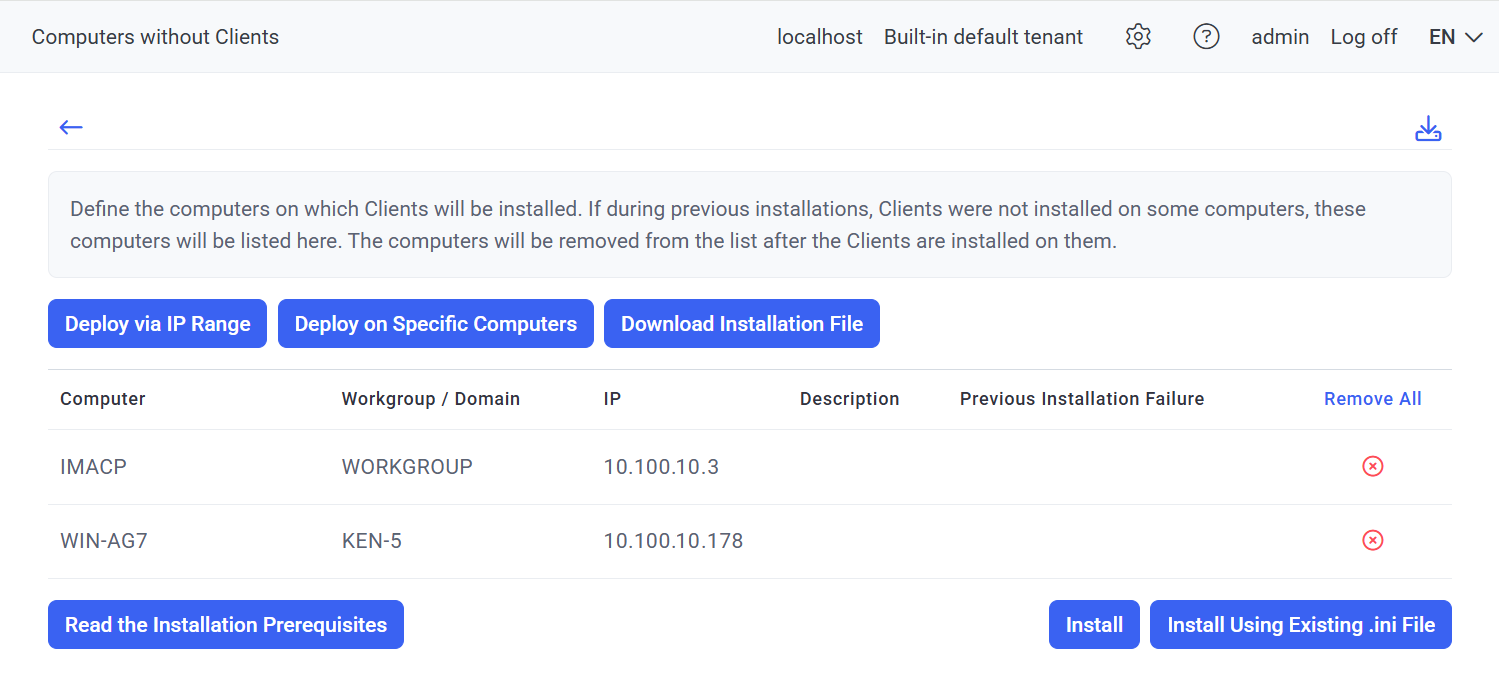
2. On the Client Configuration page that opens, enter the Server name / IP address (i.e. of the Application Server to which the Windows Clients will be connecting), and define the Client configuration for the Clients you are installing, and then click the Install button (at the bottom of the page).
NOTE: The server IP address has to be static for Clients to connect to it. Unique external IP addresses should be used for cloud-based Application Servers.
NOTE: Multiple names and IP addresses can be added, separated by commas or semicolons.
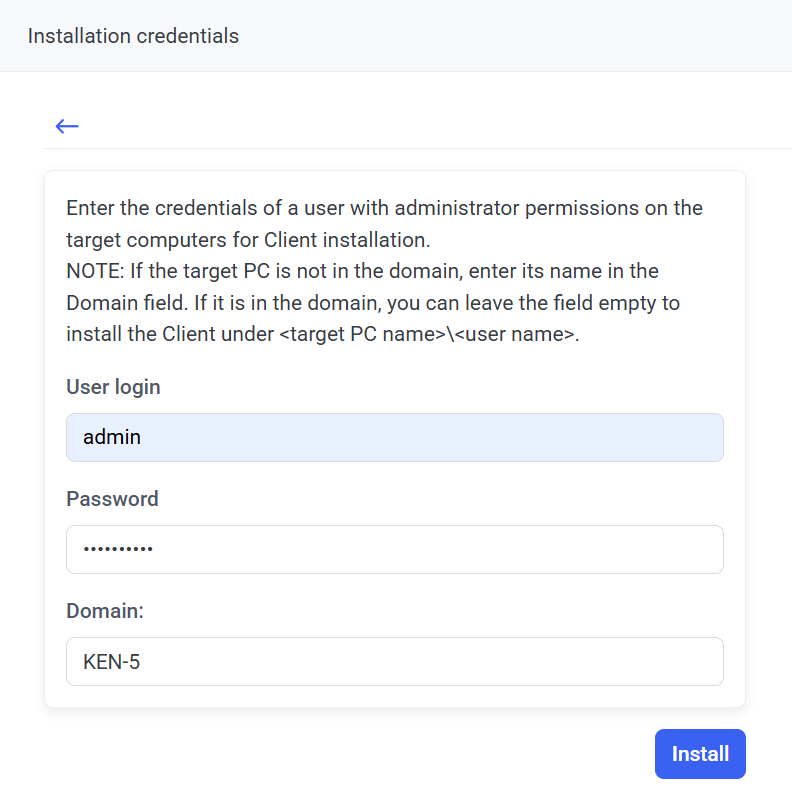
3. On the Installation Credentials page, enter the credentials of a user with administrator permissions on the target computers for Client installation, and then click Next.
• If the computers are in a domain, enter the domain administrator account credentials, and enter the domain name in the Domain field.
• If the computers are in a workgroup, enter the credentials of a local administrator for the target computers, and enter "workgroup" in the Domain field.
NOTE: If you leave the Domain field empty, the credentials entered will be used as the credentials of the local user of the target computer and the Client will be installed under the <target PC name>\<user name> account.
NOTE: If all workgroup computers do not have the same administrator account credentials, you will need to install the Clients using the installation package method.
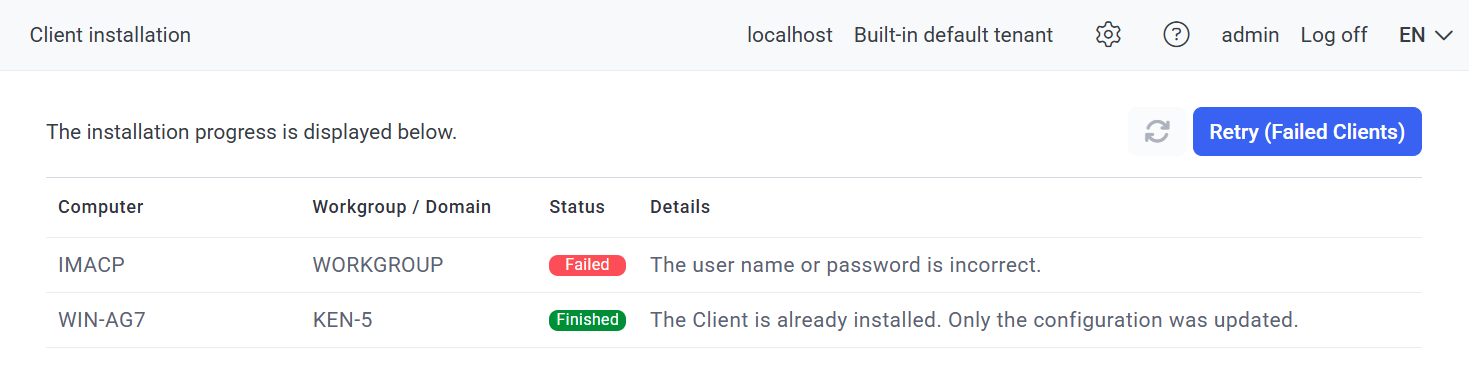
4. The installation process then starts, and its progress is shown on the Client Installation page (but if it is not updated for any reason, click the Refresh (

5. In case the installation of any Clients fails, Failed is displayed in the Status column along with the reason for failure in the Details column, and the Retry (Failed Clients) button can be clicked to attempt to install them again.
NOTE: If the connection with the Application Server fails, the Client will not be installed.
6. When installation is complete, Finished is displayed in the Status column, and the Clients installed are displayed on the Clients page (and on the Client Groups tab, in the All Clients group).