Configuring Integration of Microsoft Entra ID (Azure Active Directory) with Syteca
This guide describes how to set up and configure Microsoft Entra Domain Services (previously called Azure Active Directory Domain Services) to integrate it with Syteca, so that Microsoft Entra ID accounts can be used in Syteca, by following the steps below (in sequence).
NOTE: The following information may also be useful for reference: Tutorial - Create a Microsoft Entra Domain Services managed domain - Microsoft Entra ID | Microsoft Learn
Table of Contents
1. Creating a Resource Group
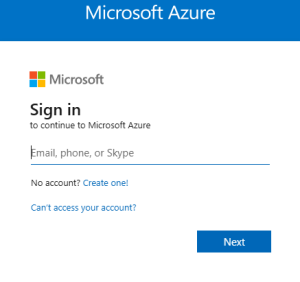
1.1. Sign in to the Azure portal.
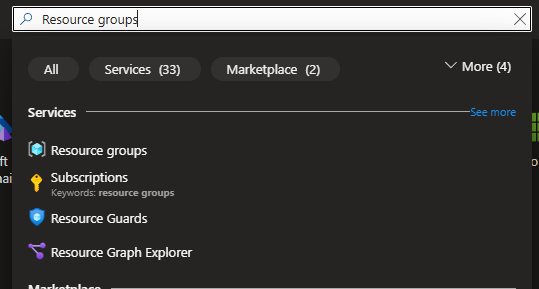
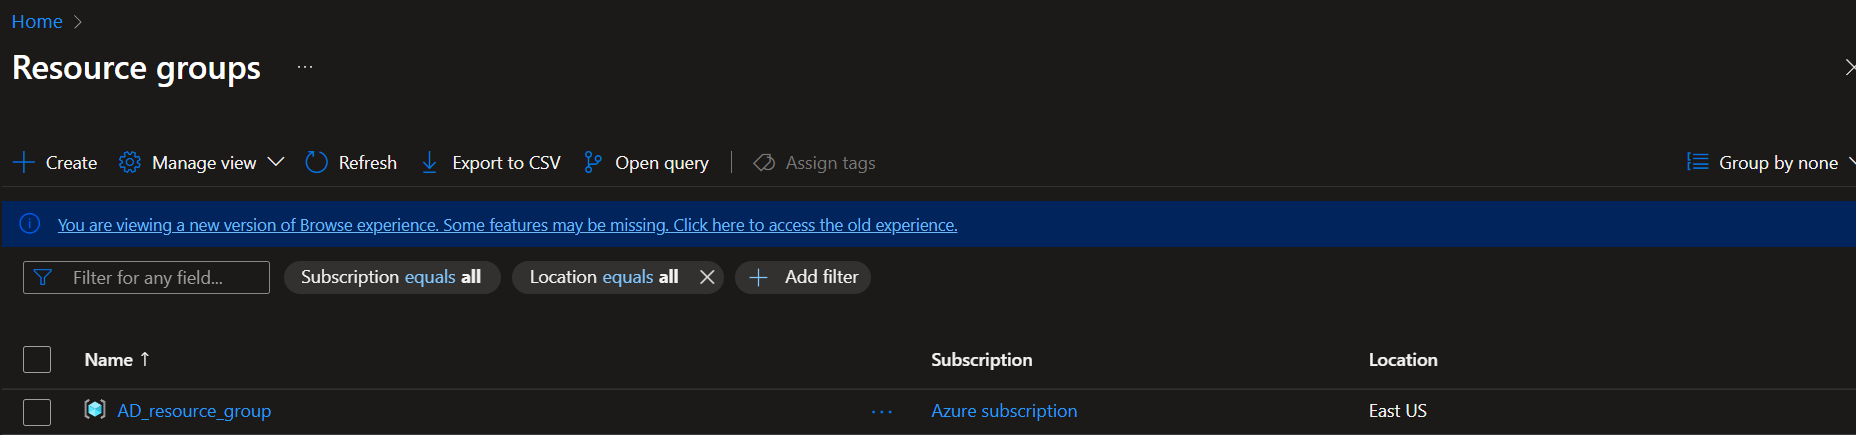
1.2. Search for, and open Resource groups.
1.3. Click Create (in the top left).

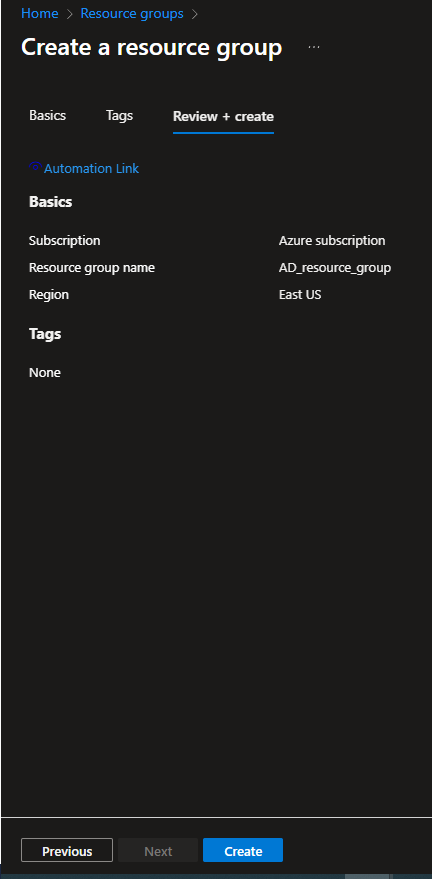
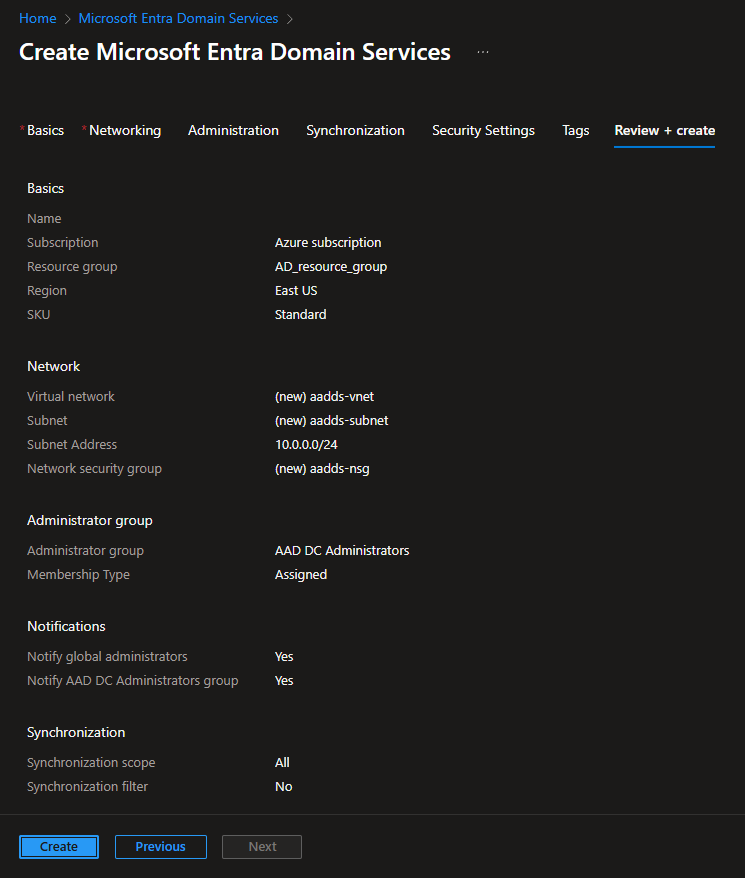
1.4. Select the Subscription required, enter a Resource group name (e.g. "AD_resource_group" is used in the screenshot below), and select the Region required, and then click the Review + create button (at the bottom).
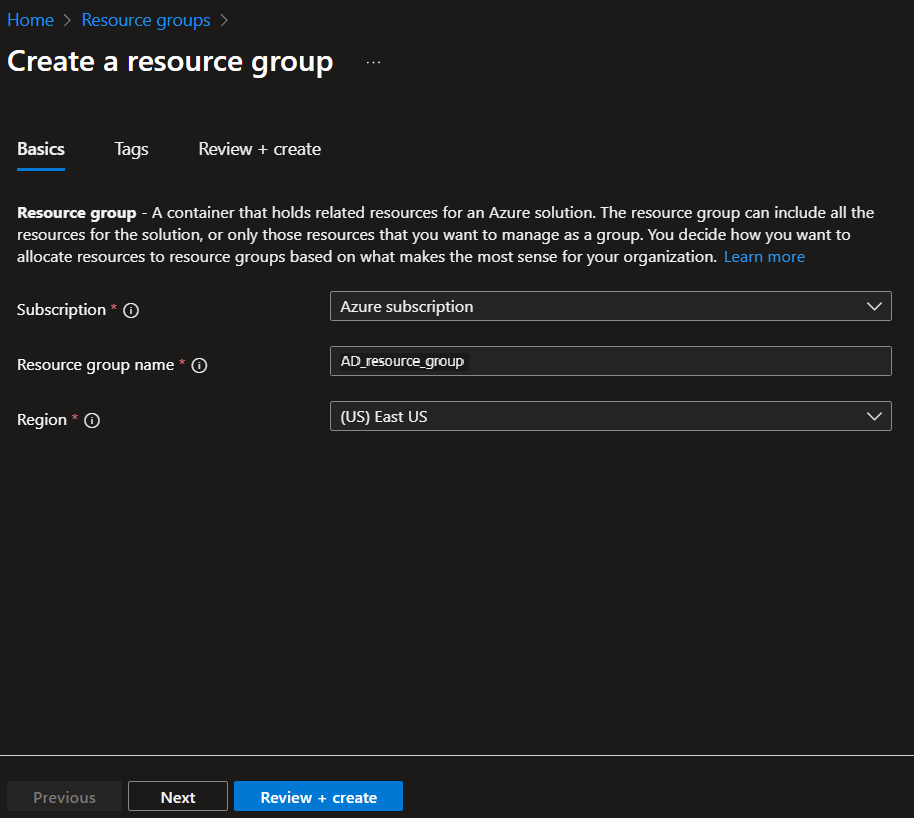
1.5. Click the Create button (at the bottom).
2. Creating a Microsoft Entra Domain Service
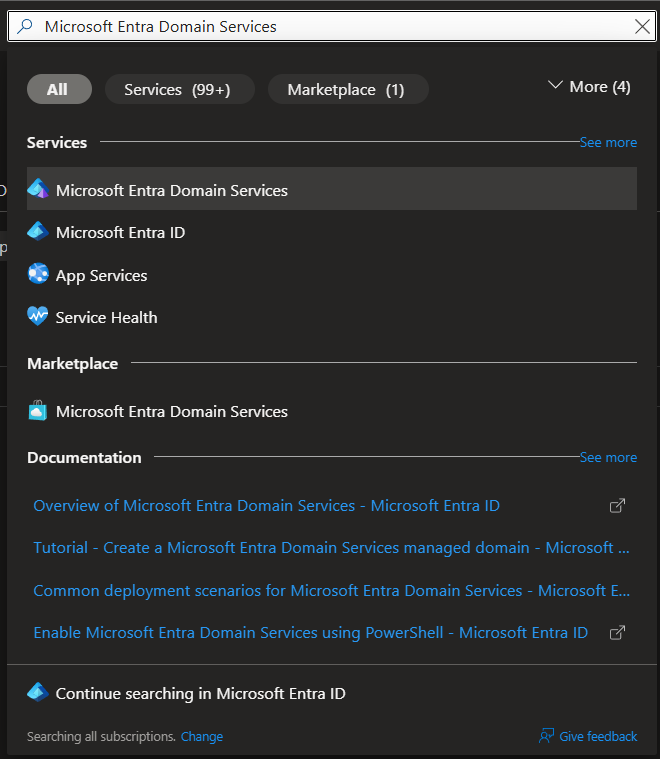
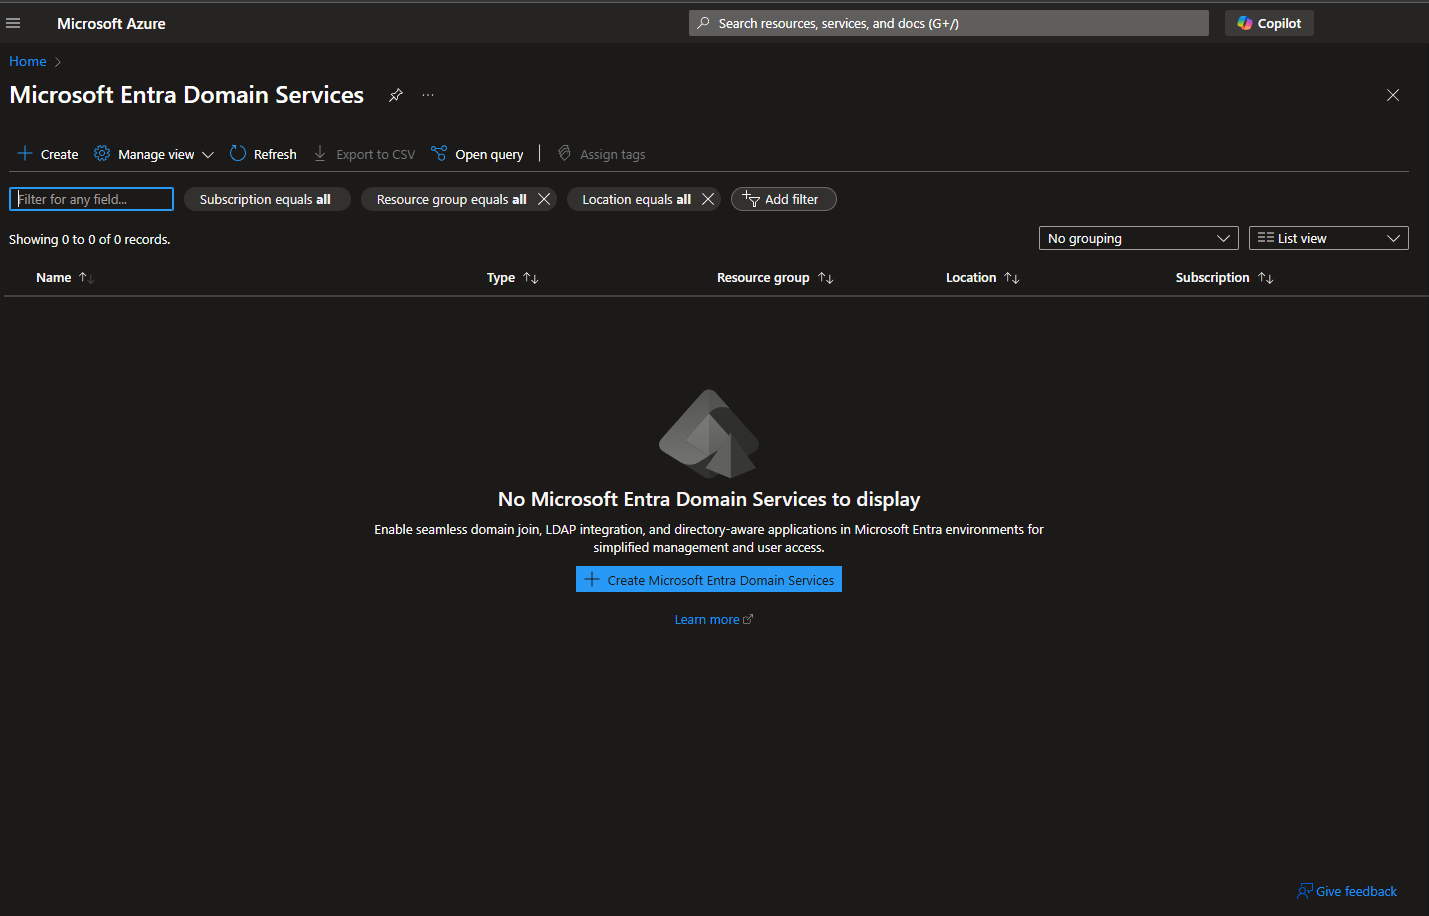
2.1. Search for, and click Microsoft Entra Domain Services to open it.
2.2. Click Create (in the top left).
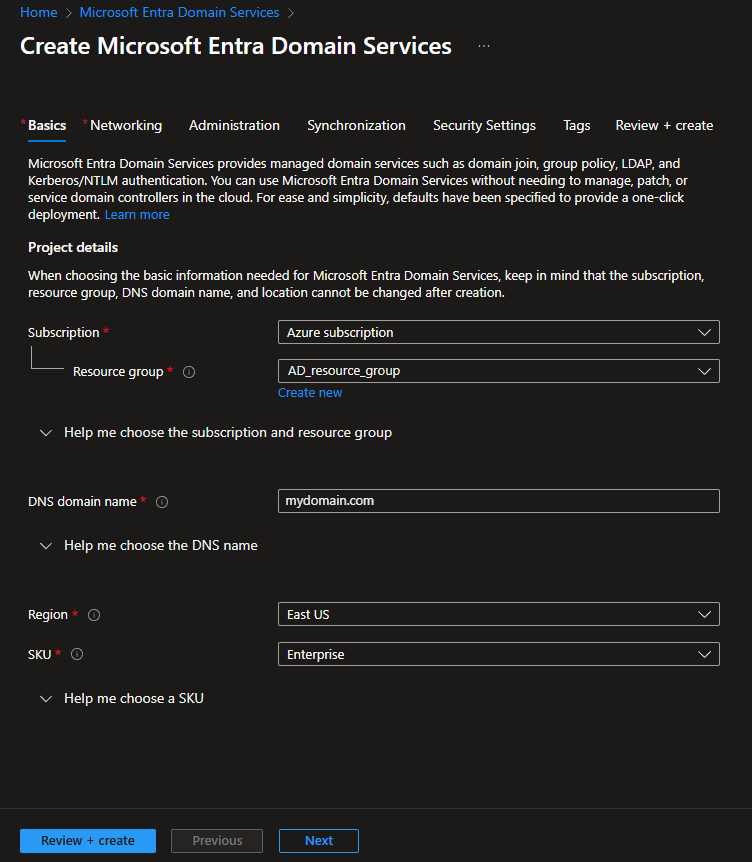
2.3. Select the following values in the corresponding fields, and then click the Review + create button (in the bottom left):
• Select the Resource group created (in Section 1 above).
• Select the DNS domain name required (e.g. "mydomain.com" is used in the screenshot below).
NOTE: The DNS domain can be created as a custom domain name in the "Domain Names" service in Azure, and it needs to be a verified domain.
• Select the Region required.
• Select the SKU required (Enterprise for larger environments, or Standard for smaller environments).
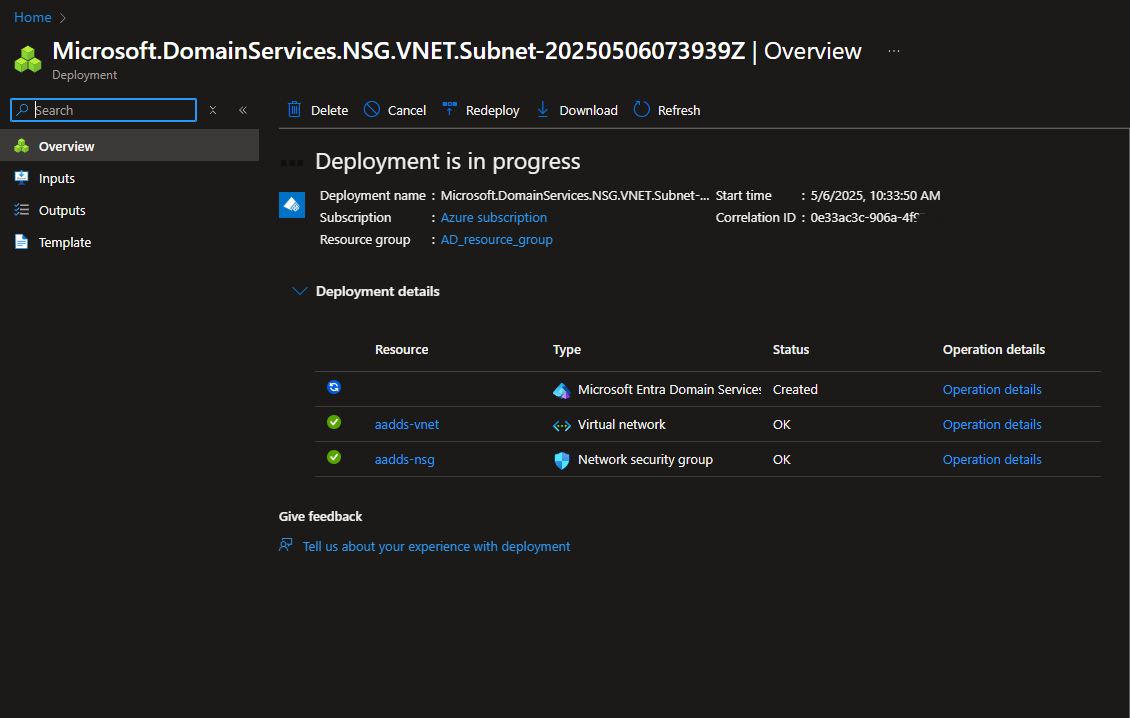
2.4. Click the Create button (in the bottom left).
2.5. Wait for deployment to complete.
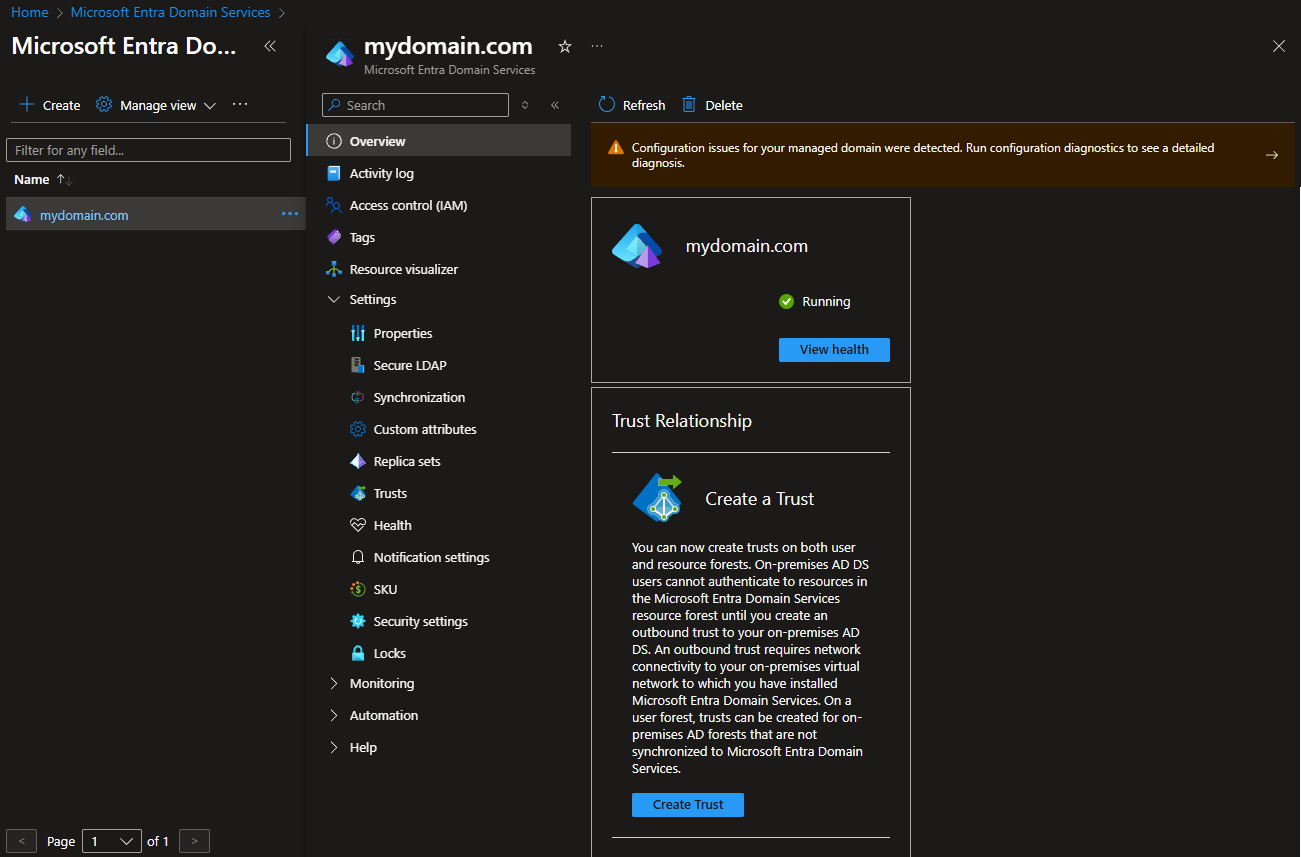
3. Checking that the Domian is Running
3.1. Open Microsoft Entra Domain Services, and check that the domain is running.

4. Configuring an LDAPS (Secure LDAP).
IN SAAS ONLY: Instead of a self-signed certificate (below), a trusted certificate from an official certificate authority needs to be used.
4.1. Run the following PowerShell commands on a Windows computer to create a self-signed certificate:
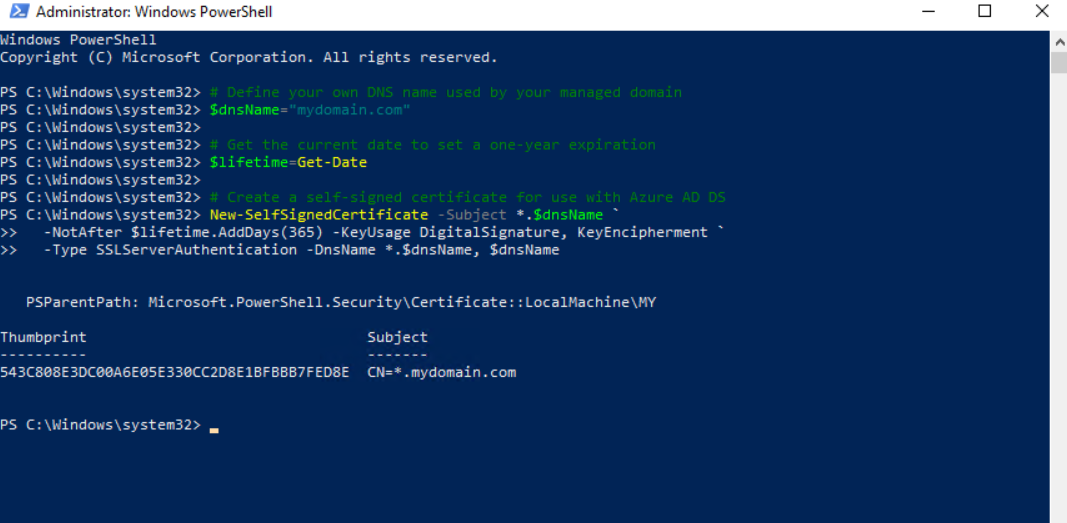
# Define your own DNS name used by your managed domain
$dnsName="mydomain.com"

# Get the current date to set a one-year expiration
$lifetime=Get-Date

# Create a self-signed certificate for use with Azure AD DS
New-SelfSignedCertificate -Subject *.$dnsName `
  -NotAfter $lifetime.AddDays(365) -KeyUsage DigitalSignature, KeyEncipherment `
  -Type SSLServerAuthentication -DnsName *.$dnsName, $dnsName
NOTE: Instead of PowerShell, other tools such as OpenSSL, Keytool, or MakeCert can be used.
NOTE: Instead of a self-signed certificate, a certificate from a public certificate authority or an enterprise certificate authority can be used.
4.2. Export the self-signed certificate created (to be added to Settings > Secure LDAP of the domain created in Section 2 above) by using mmc, as follows:
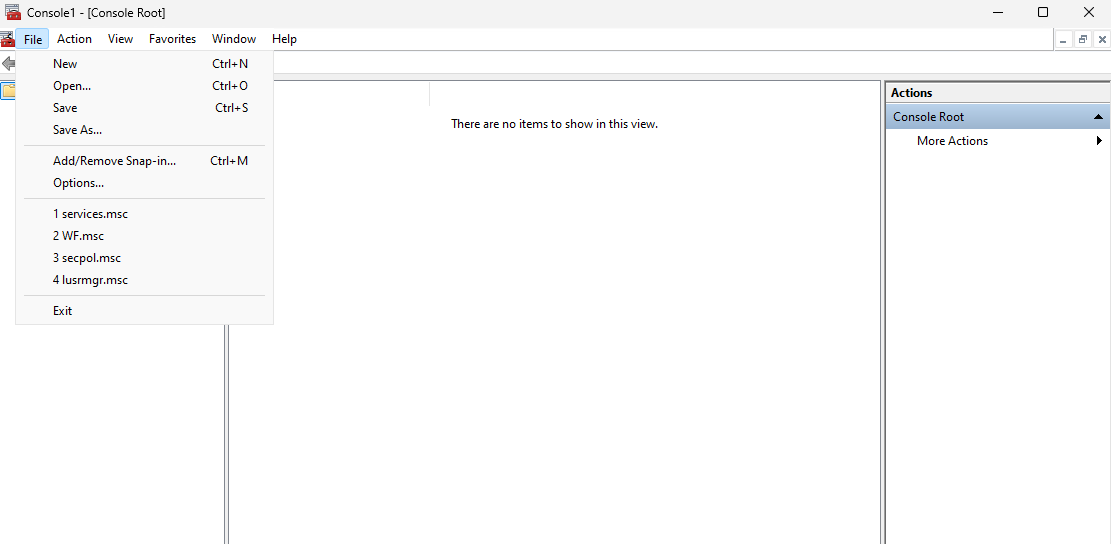
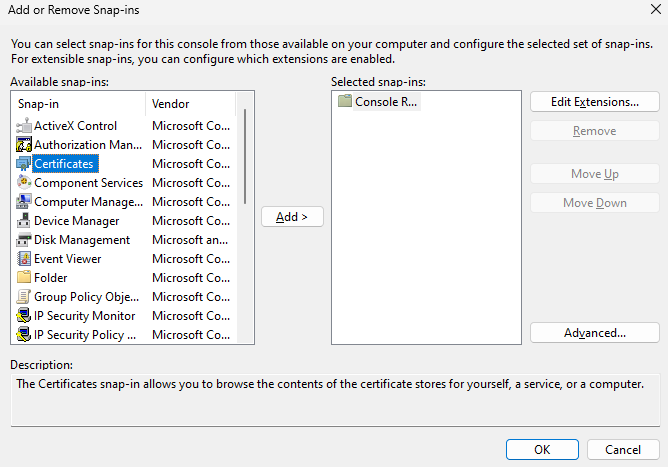
4.2.1. Open mmc, and on the File menu, select Add/Remove Snap-in...
4.2.2. Select Certificates, and click Add.
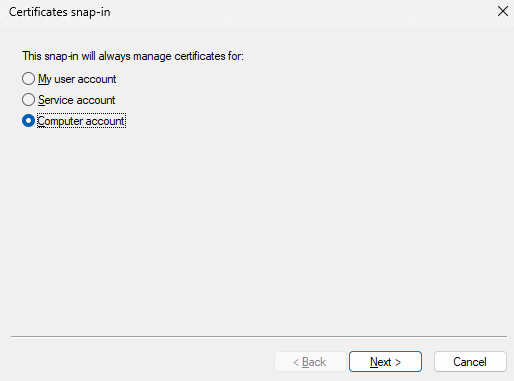
4.2.3. Select Computer account, and click Next.
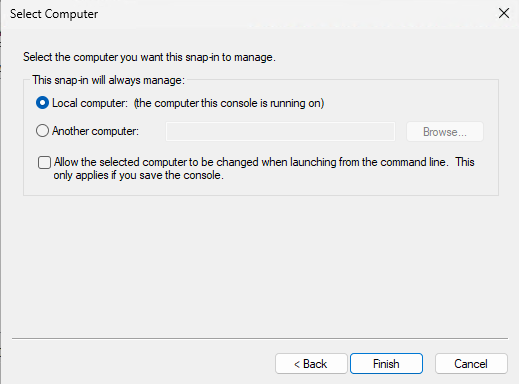
4.2.4. Select Local computer, and click Finish.
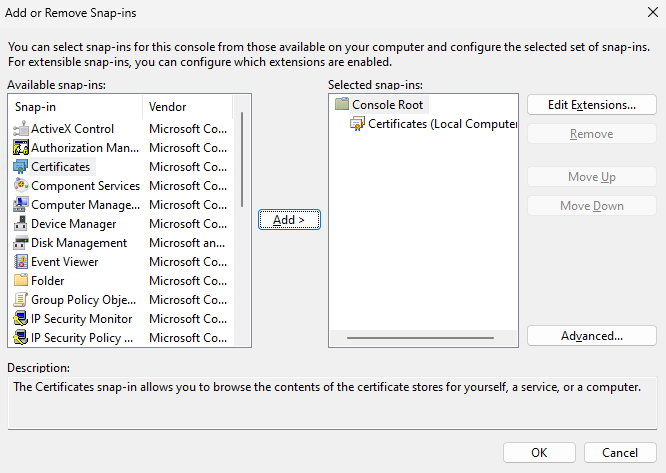
4.2.5. Click OK.
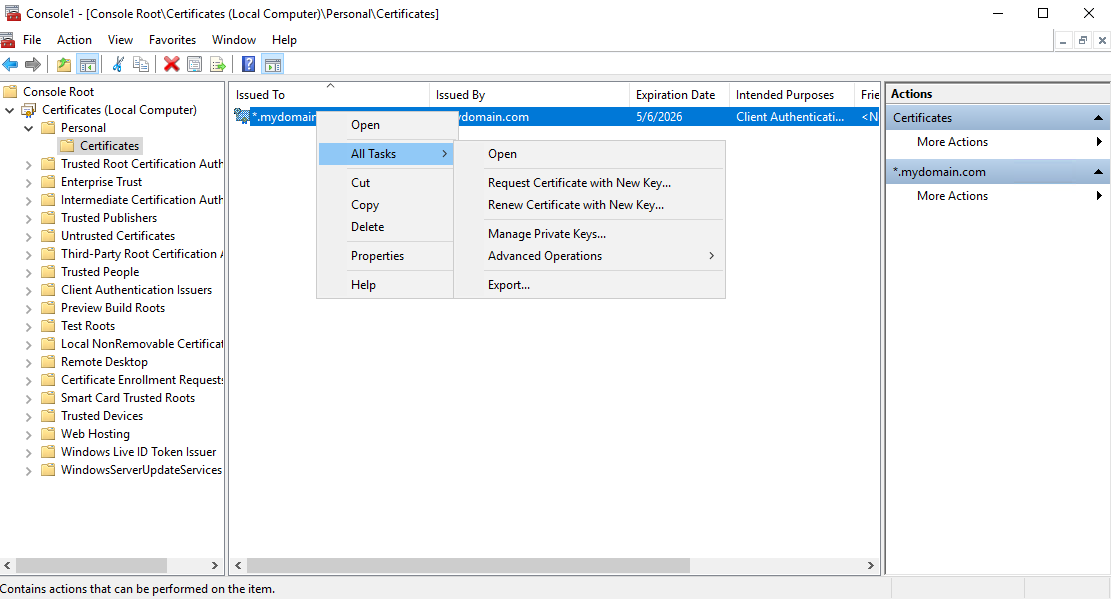
4.2.6. Open the Certificates (Local Computer) > Personal > Certificates folder (i.e. store).
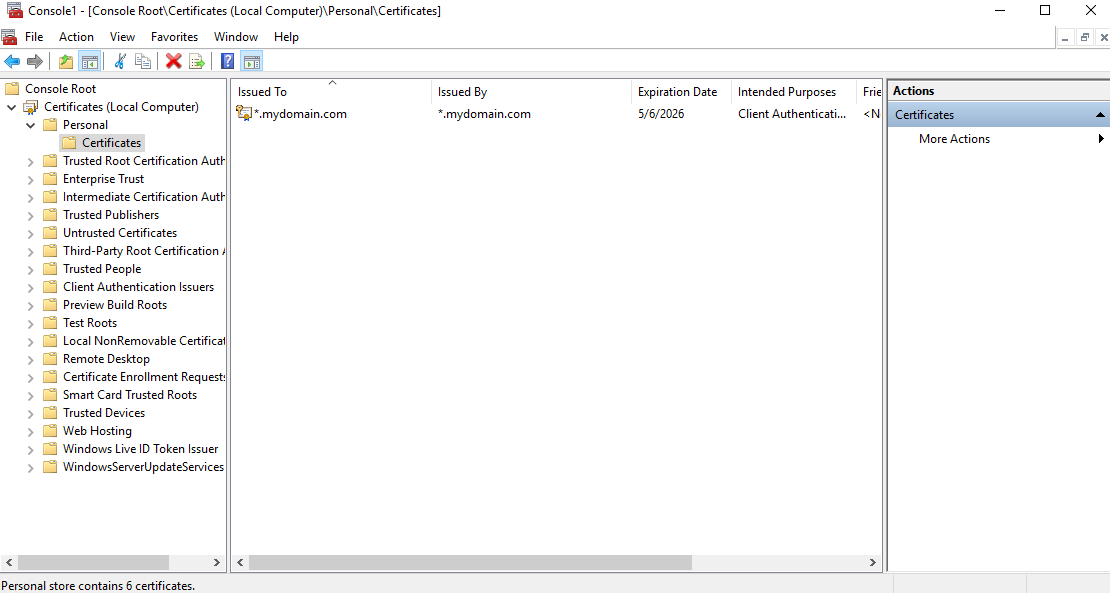
4.2.7. Right-click on the self-signed domain certificate, and select All Tasks > Export…

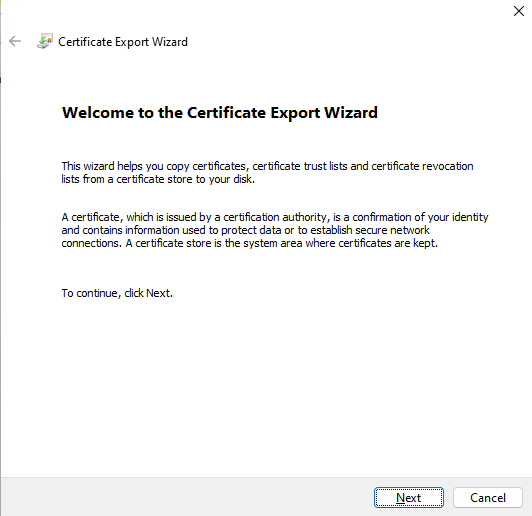
4.2.8. Click Next.

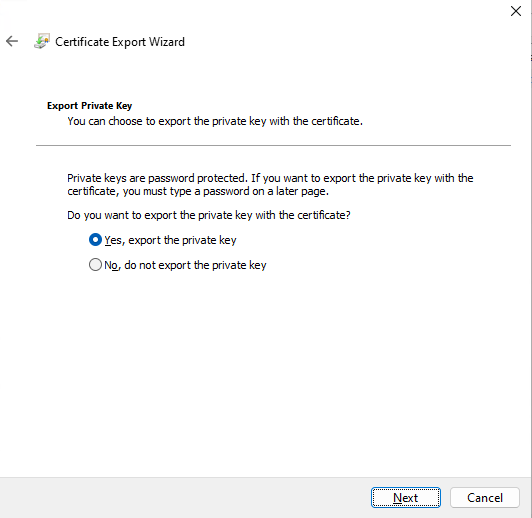
4.2.9. Select Yes, export the private key, and click Next.
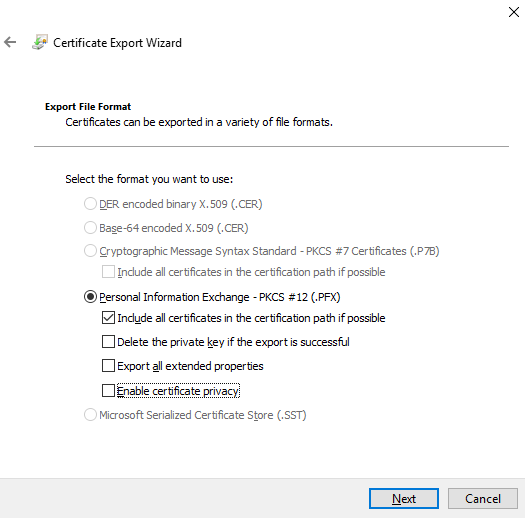
4.2.10. Deselect the Enable certificate privacy checkbox, and click Next.
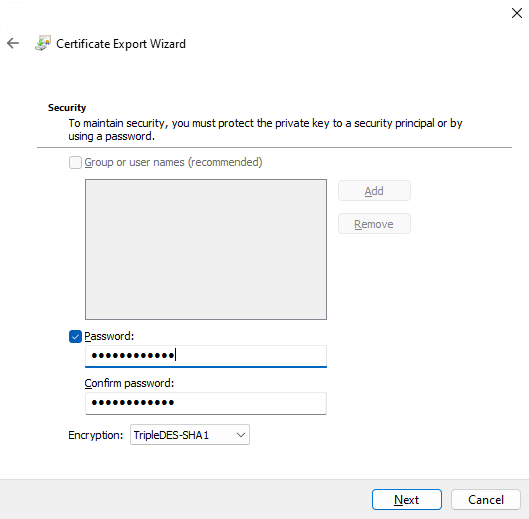
4.2.11. Enter a Password for the certificate (and enter it again in the Confirm password field), and then click Next.
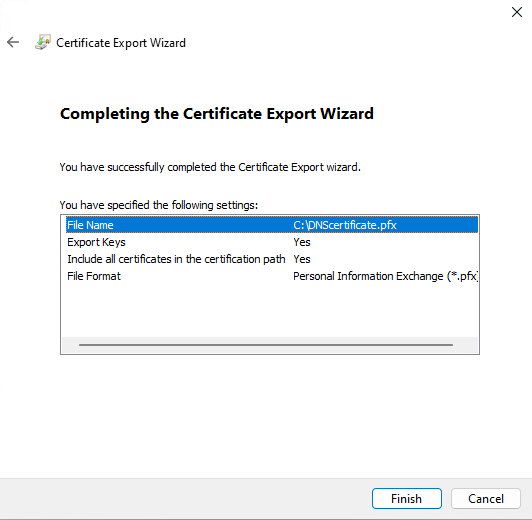
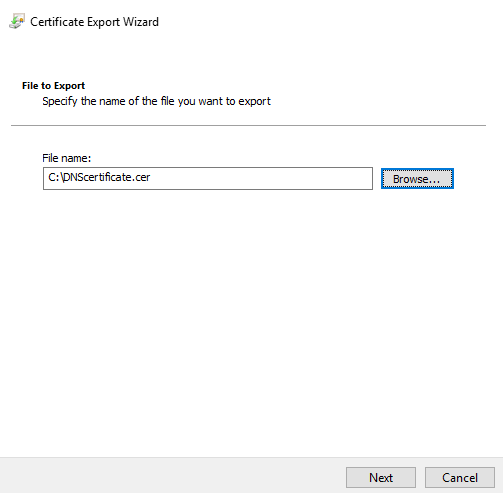
4.2.12. Click Browse..., and select the folder to export the PFX certificate to, and then click Next.

4.2.13. Click Finish to export the certificate.
4.3. Export the certificate again (but this time in a different file format), by using mmc (to be used on the computer where Syteca Application Server is installed), as follows:
4.3.1. Back in the Certificates (Local Computer) > Personal > Certificates folder in mmc, right-click on the self-signed domain certificate, and select All Tasks > Export…
4.3.2. Click Next.
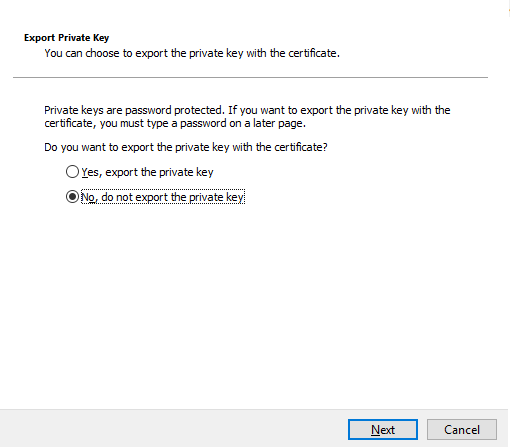
4.3.3. Select No, do not export the private key, and click Next.
4.3.4. Select Base-64 encoded X.509 (.CER), and click Next.

4.3.5. Click Browse..., and select the folder to export the CER certificate to, and then click Next.
4.3.6. Click Finish to export the certificate.
4.4. Add the certificate exported in the PFX format (in Point 4.2. above) to Settings > Secure LDAP, as follows:
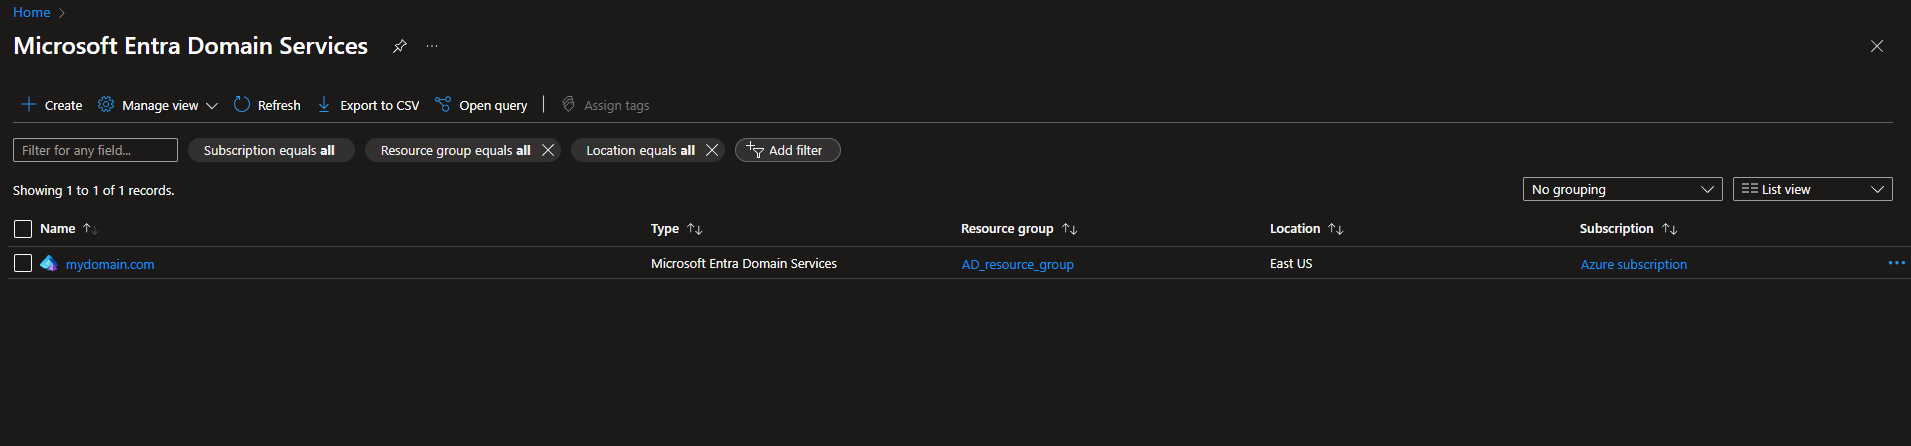
4.4.1. Open Microsoft Entra Domain Services, and click on the domain in the Name column (created in Section 2 above).
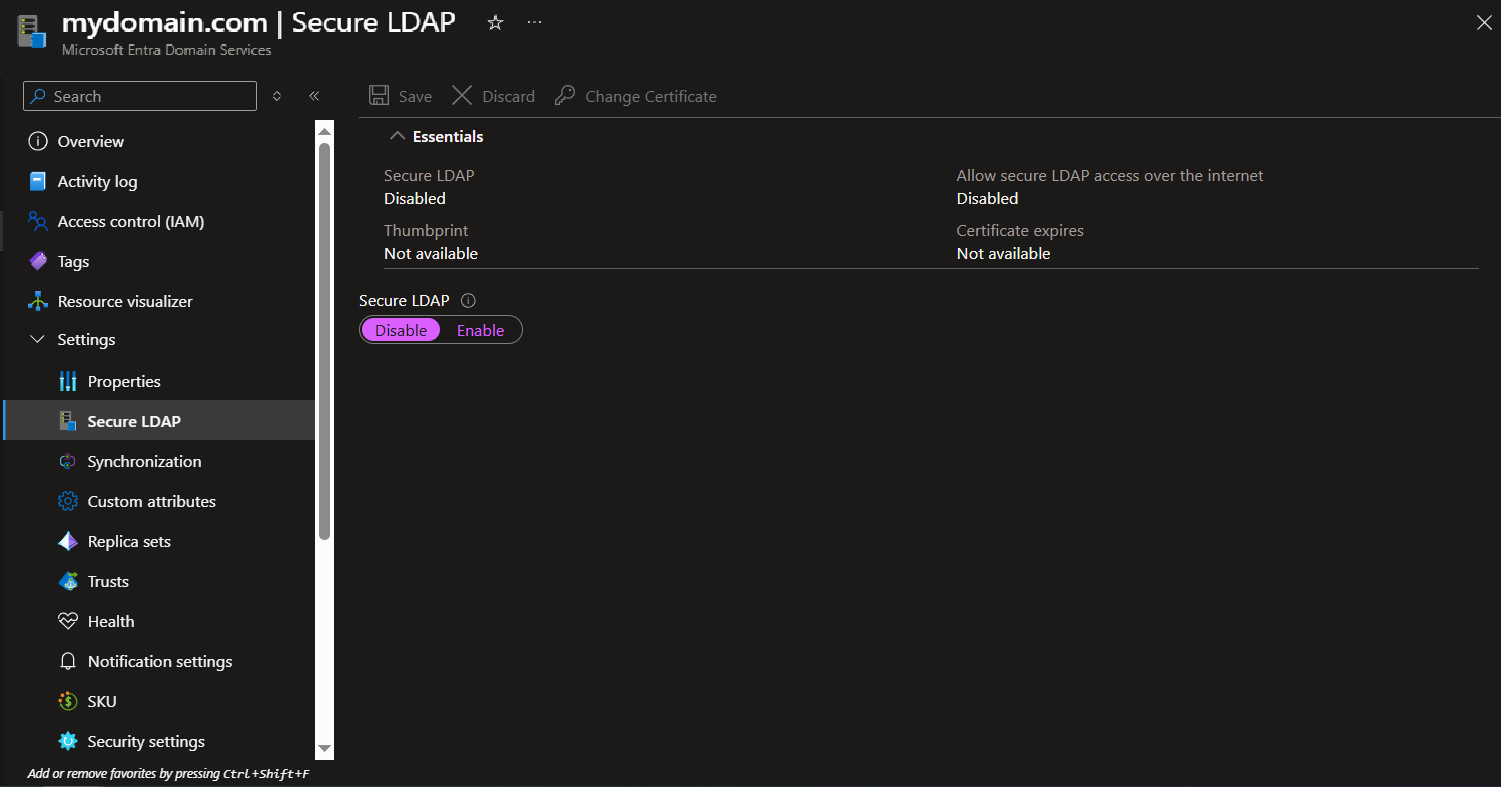
4.4.2 Select Settings (in the menu on the left), and select Secure LDAP, and then click Enable to enable the Secure LDAP.
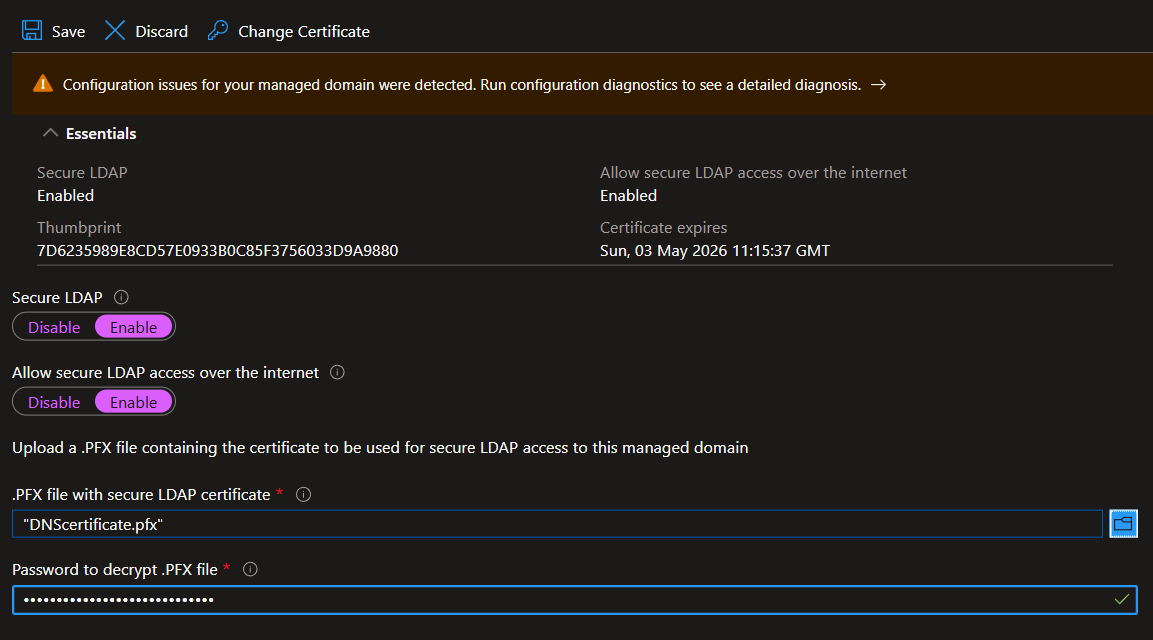
4.4.3. Click Enable to enable Allow secure LDAP access over the internet, and upload the PFX certificate (exported in Point 4.2 above), and then enter the Password to decrypt .PFX file, and click Save (in the top left).
4.5. Add the CER client certificate (exported in Point 4.3 above) to Trusted Root Certification Authorities on the computer where Syteca Application Server is installed, as follows:
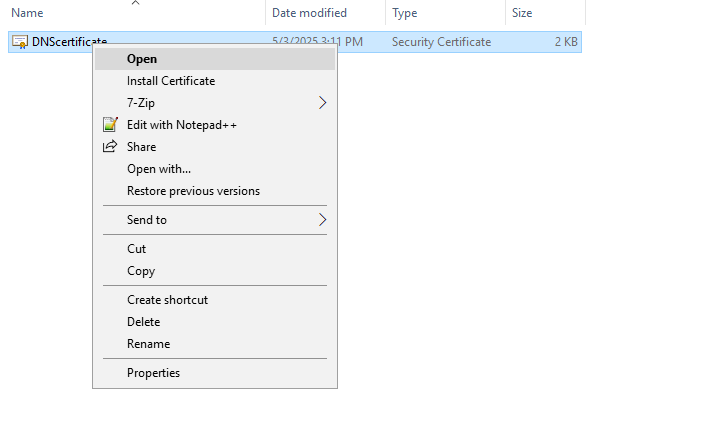
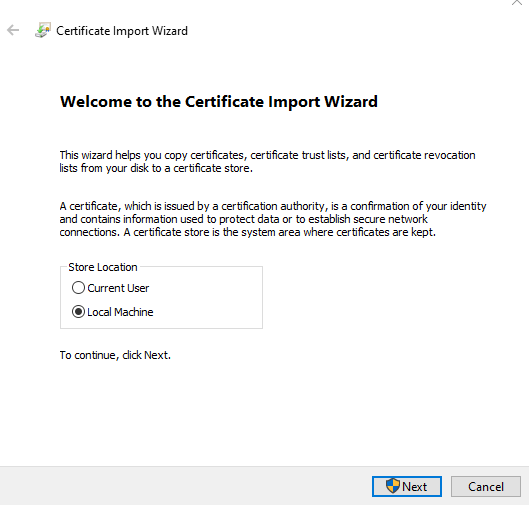
4.5.1. Copy the CER certificate to the computer where Syteca Application Server is installed, and right-click on it, and select Install Certificate.
4.5.2. Select Local Machine, and click Next.
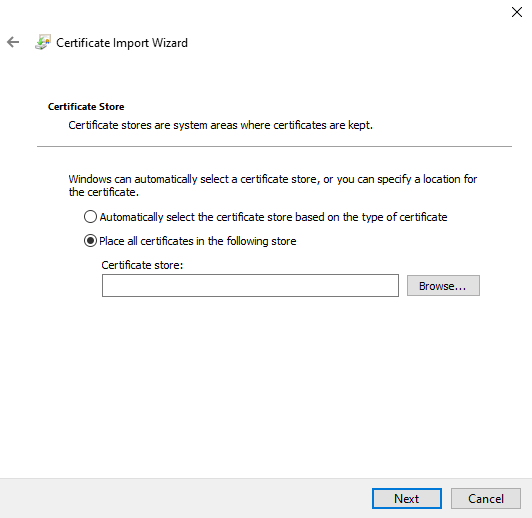
4.5.3. Select Place all certificates in the following store, and click Browse...
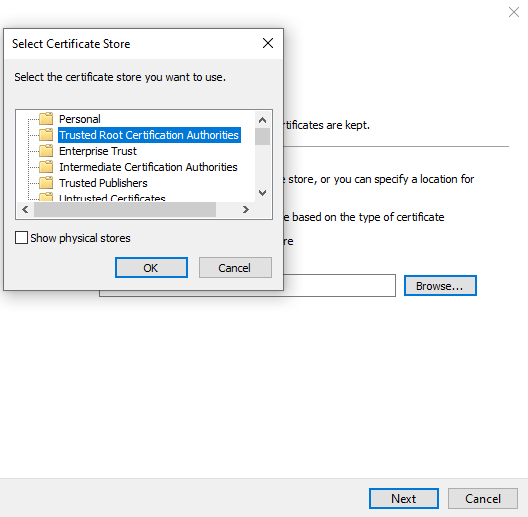
4.5.4. Select Trusted Root Certification Authorities, and click OK.
4.5.5. Click Next.
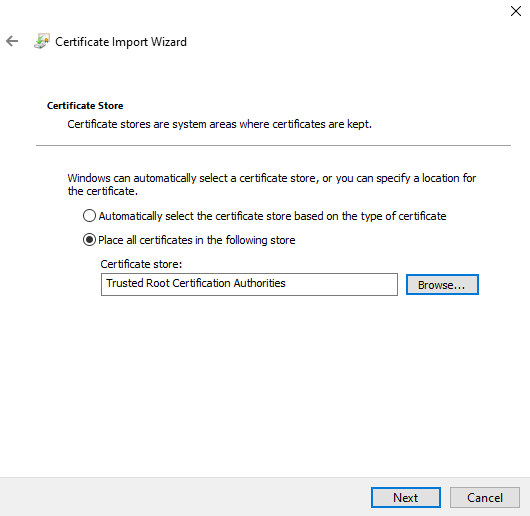
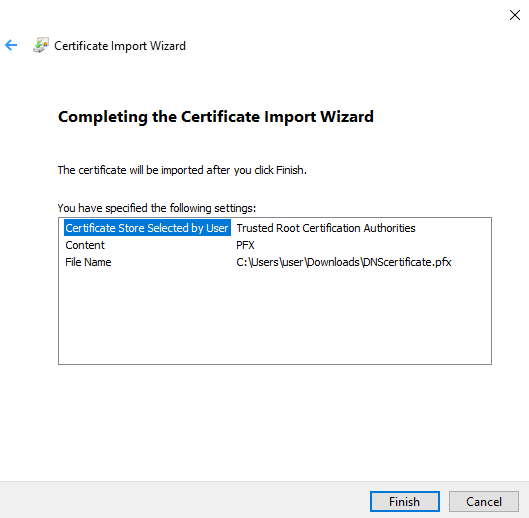
4.5.6. Click Finish.
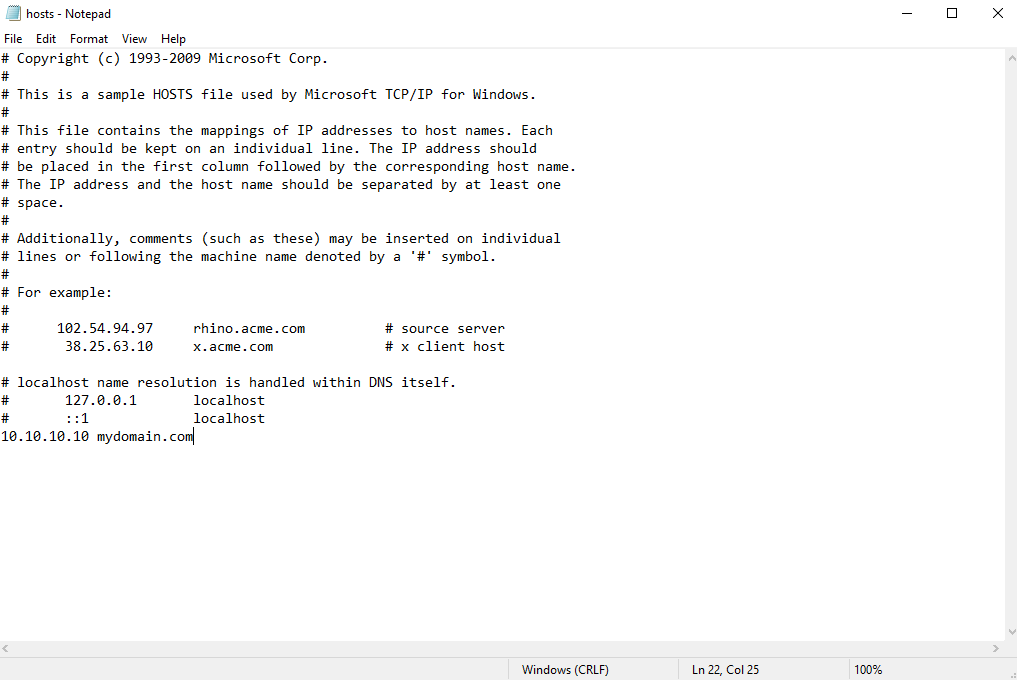
4.6. Add the IP address and host name of the Microsoft Entra domain to the hosts file (if there is no resolve between the Microsoft Entra domain and the computer where Syteca Application Server is installed), as follows:
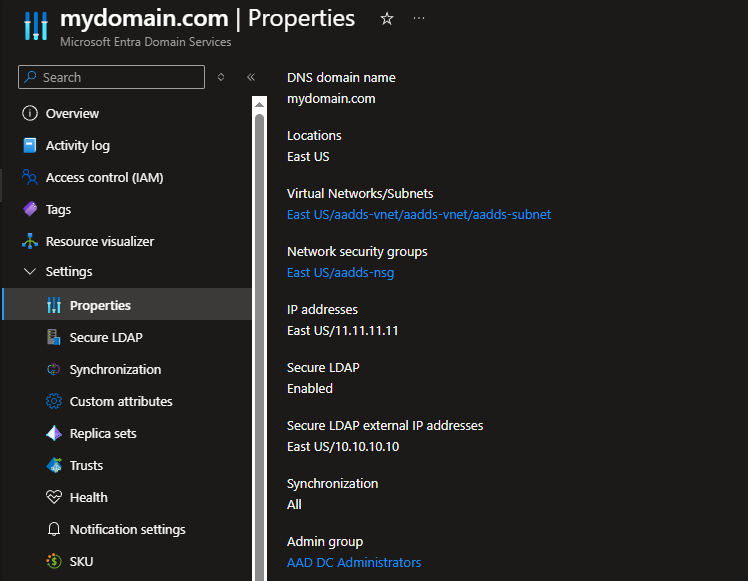
4.6.1. In Microsoft Entra Domain Services, select the domain Name (deployed in Section 2 above) in the menu on the left, and then select Settings > Properties in the main menu.
4.6.2. Copy the Secure LDAP external IP address displayed.
4.6.3. Open the hosts file (C:\Windows\System32\drivers\etc\hosts) on the computer where Syteca Application Server is installed.
4.6.4. Add the Secure LDAP external IP address and the DNS domain name to the hosts file (e.g. as shown in the screenshot below), and save it.
4.7. Configure a firewall rule to connect to the LDAPS from the remote computer where Syteca Application Server is installed, as follows:
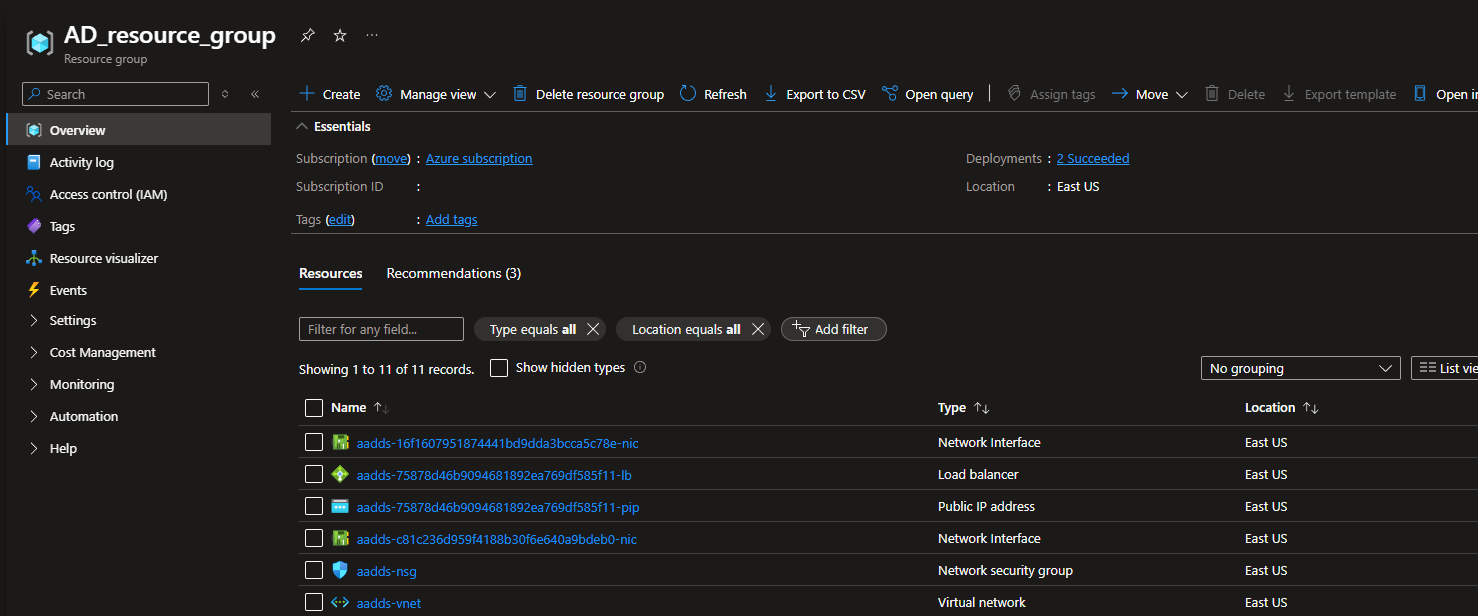
4.7.1. Click on the resource group in the Name column (where the domain is deployed) to open it.
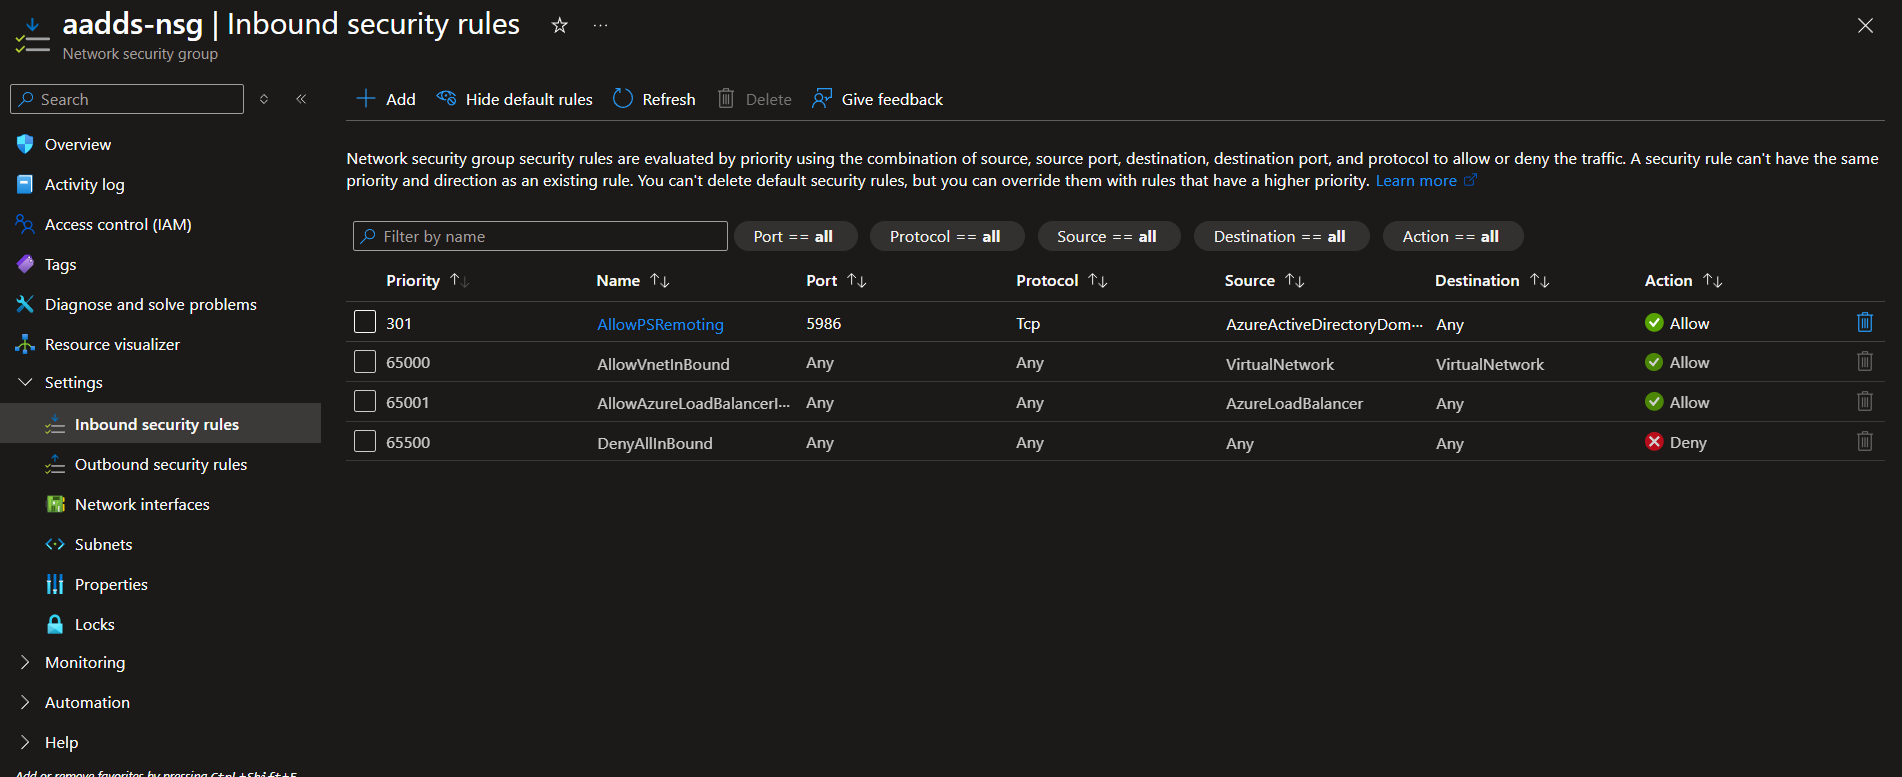
4.7.2. Click on the required resource of the Network security group type in the Name column (e.g. the default "aadds-nsg" group is used in the screenshot below) to open it.
4.7.3. Select Settings in the main menu (on the left).
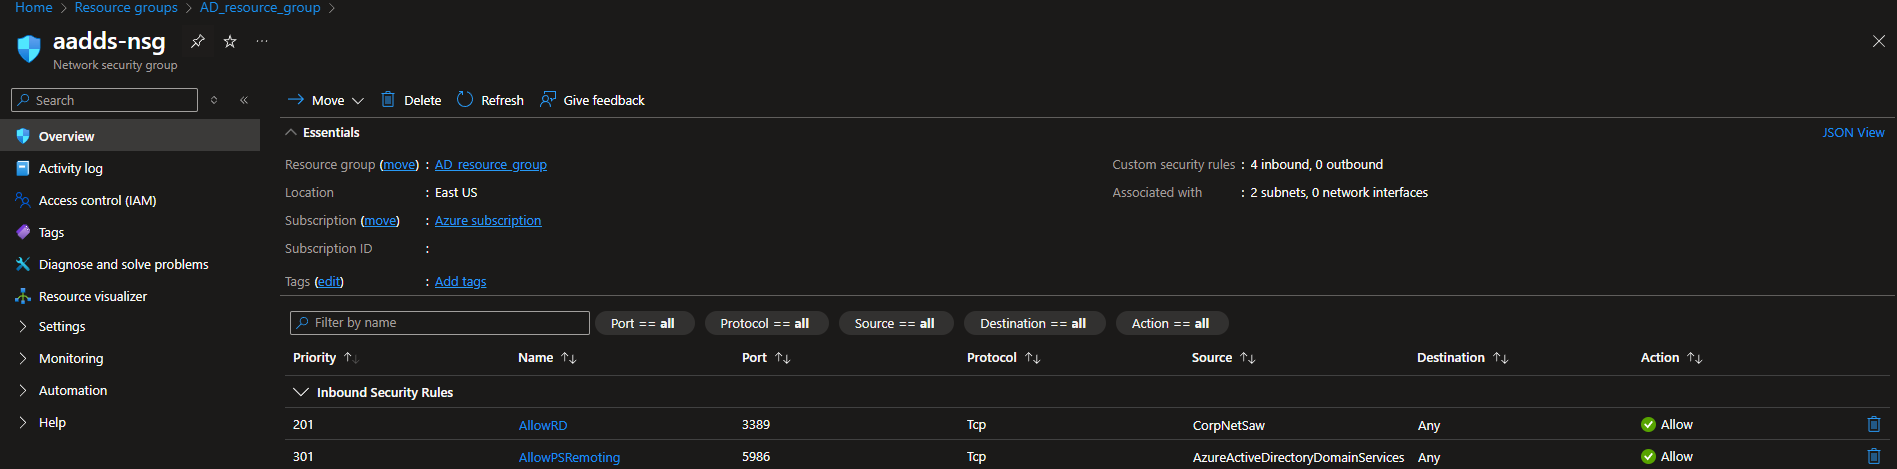
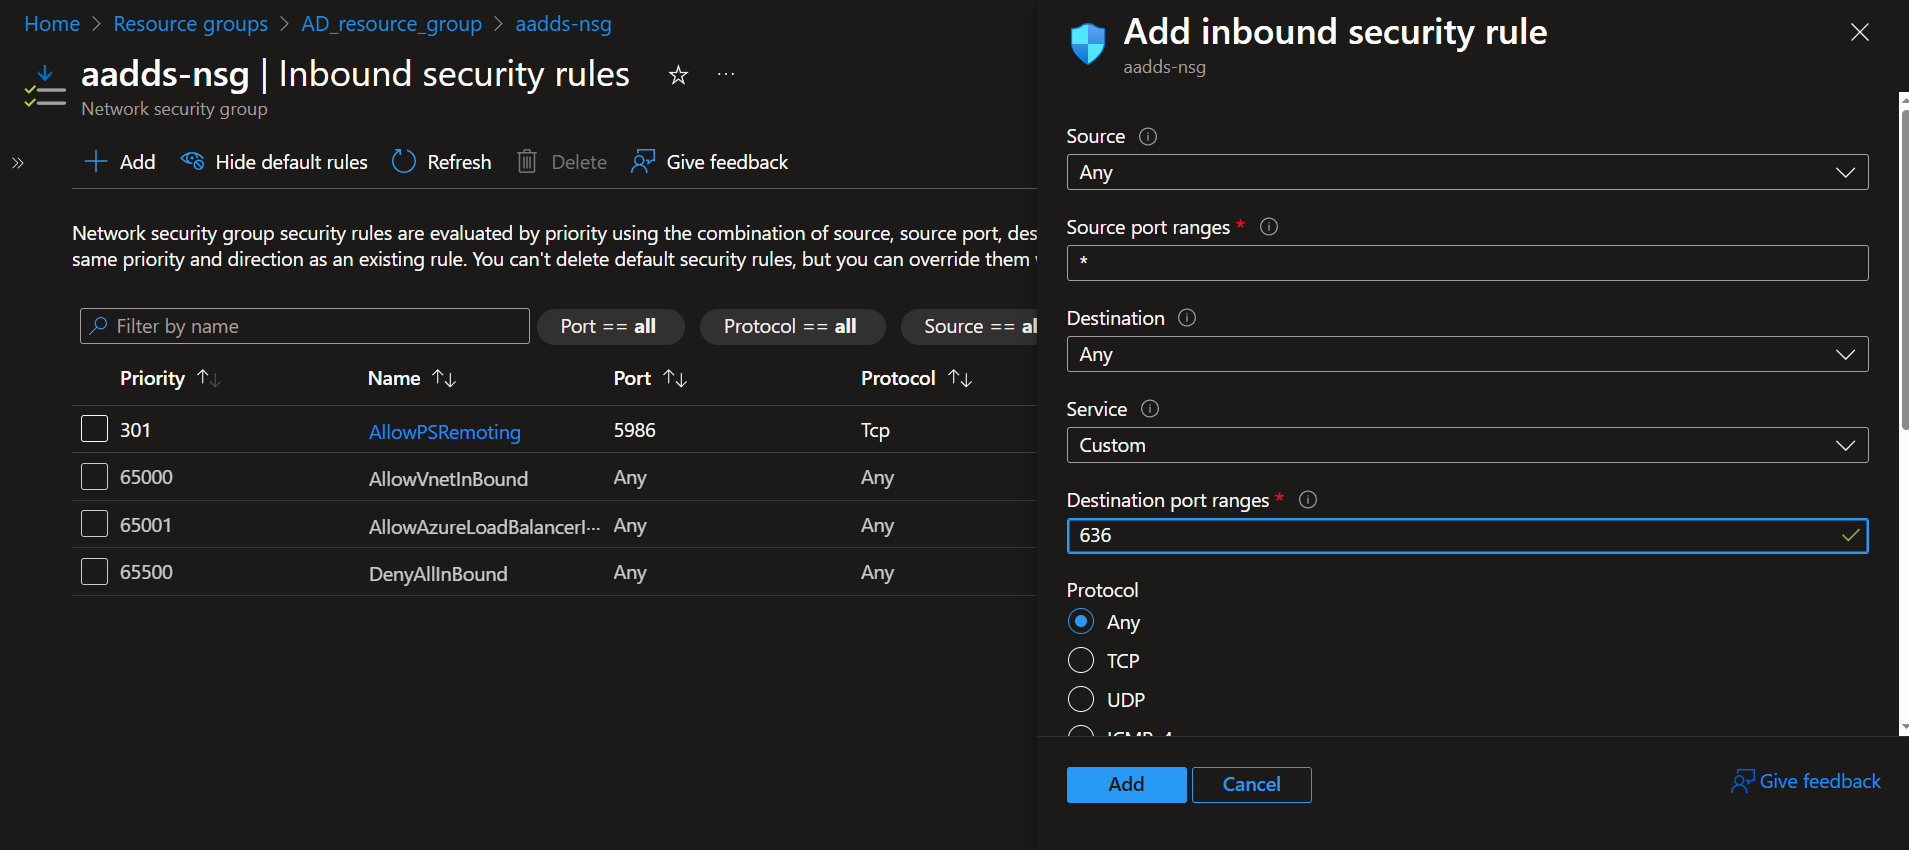
4.7.4. Select Inbound security rules, and click the Add button (at the top).
4.7.5. In the new rule, enter the value "636" in the Destination port ranges field, and then click the Add button (at the bottom).
5. Creating a New Microsoft Entra ID User
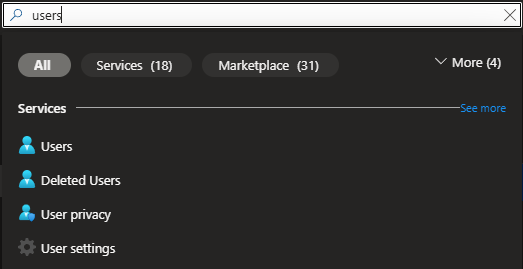
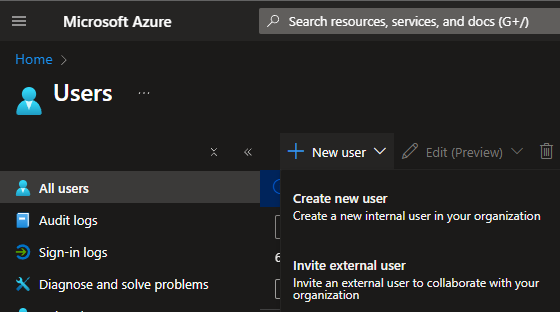
5.1. Open the Users page in the Azure portal.
5.2. On the All users tab, click the New user button.
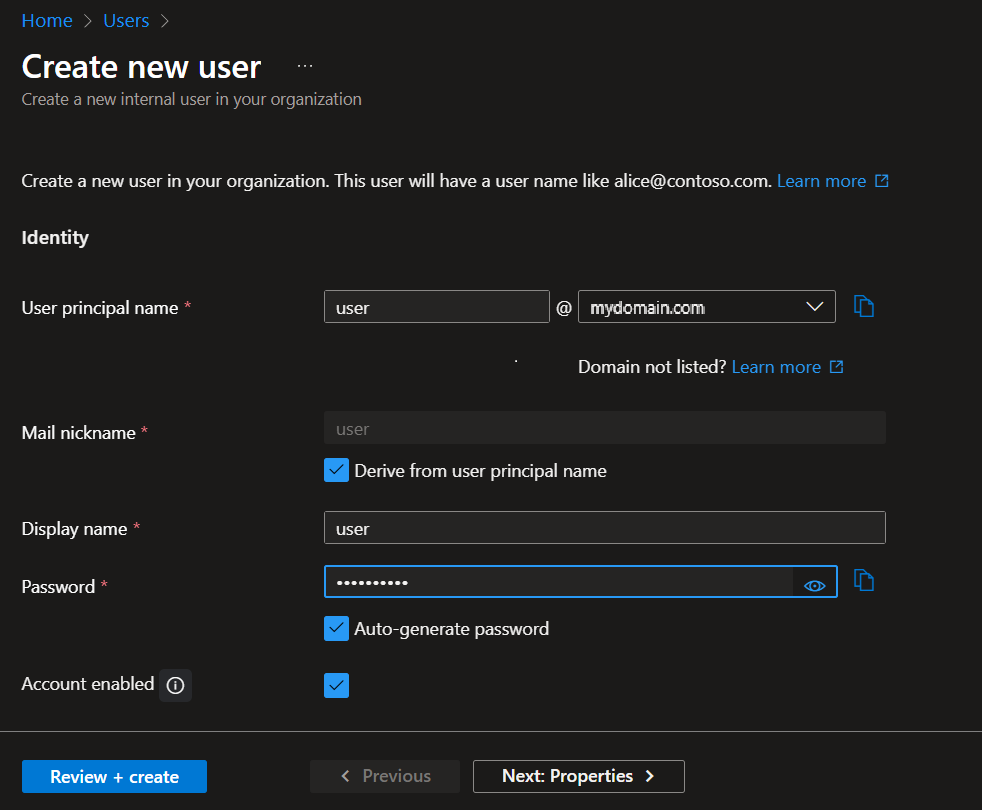
5.3. Enter a User principal name (and select the Domain), a Display name, and a Password (or select Autogenerate password), and then click the Review + create button (in the bottom left).
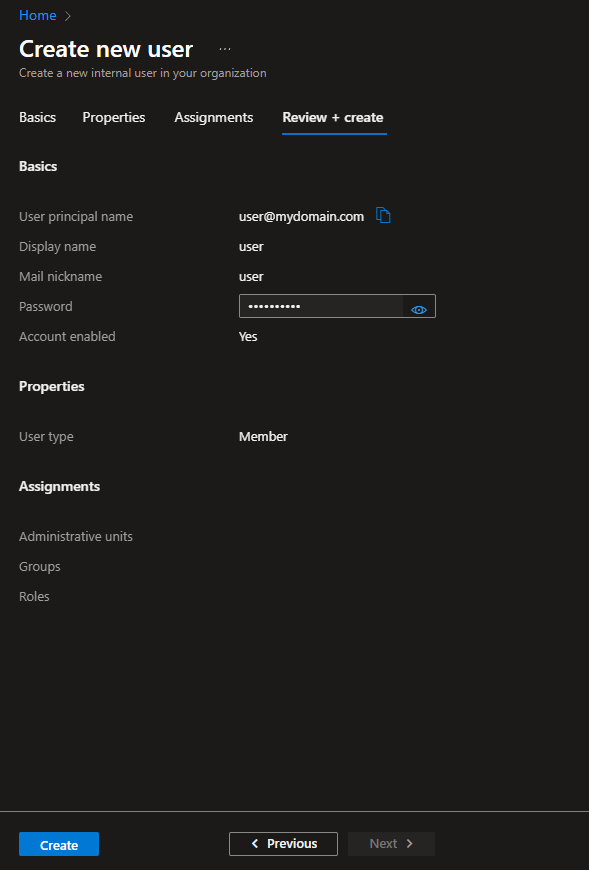
5.4. Click Create (in the bottom left).
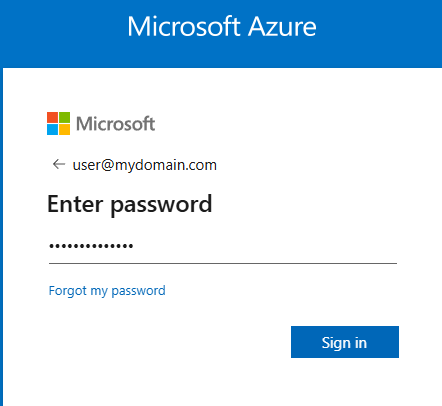
5.5. Sign in to the Azure portal as the new user.
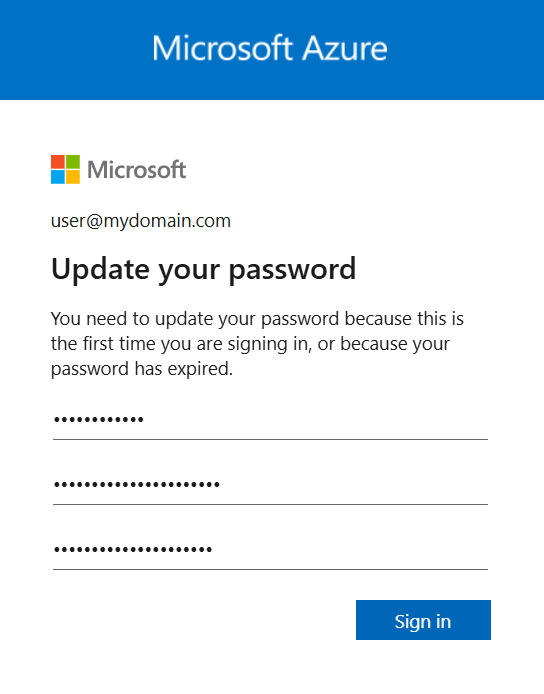
5.6. Make sure to change the password (when prompted).
5.7. The user is then logged in.
6. Adding an LDAP Target to the Management Tool
NOTE: For Microsoft Entra ID accounts which had their password changed before deploying Microsoft Entra Domain Services (as above), their password must again be changed after deploying Microsoft Entra Domain Services in order to use these accounts in Syteca (see Point 5.6 above).
6.1. Log in to the Syteca Management Tool as a user in the default Administrators user group, and click the Configuration (
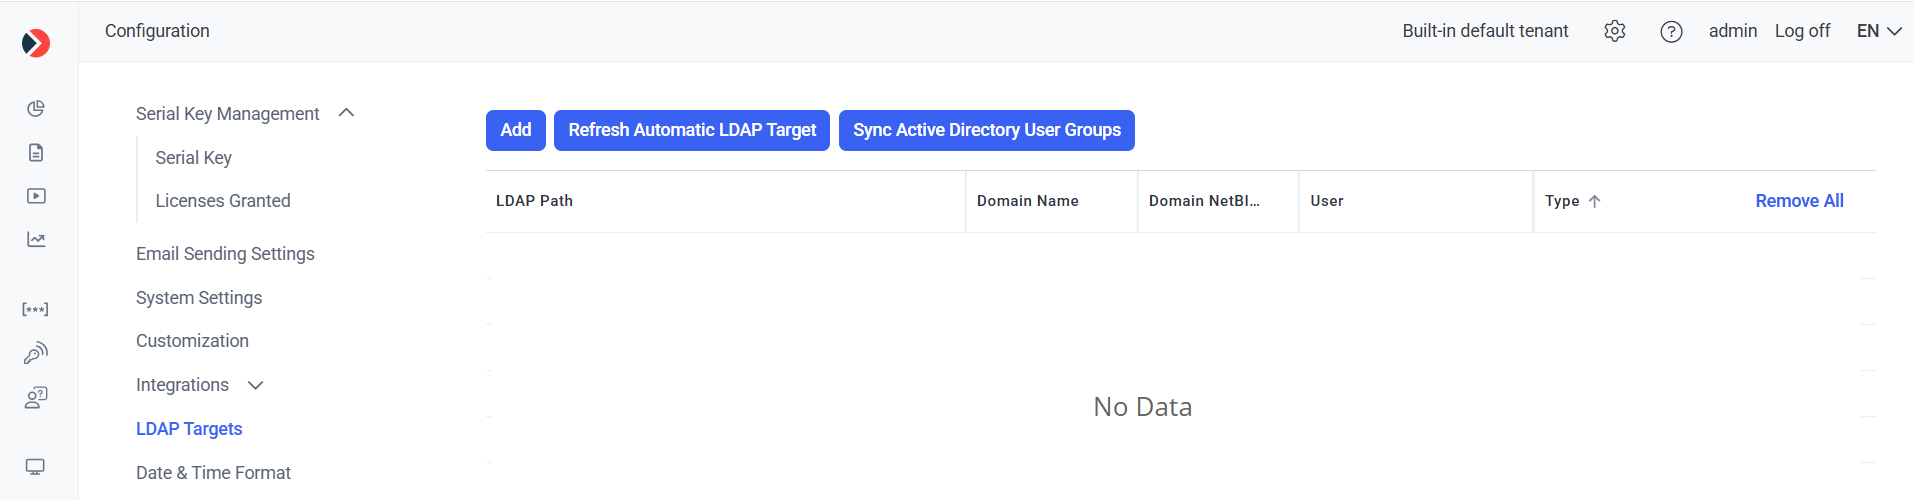
6.2. Click Add, and enter the following data in the corresponding fields:
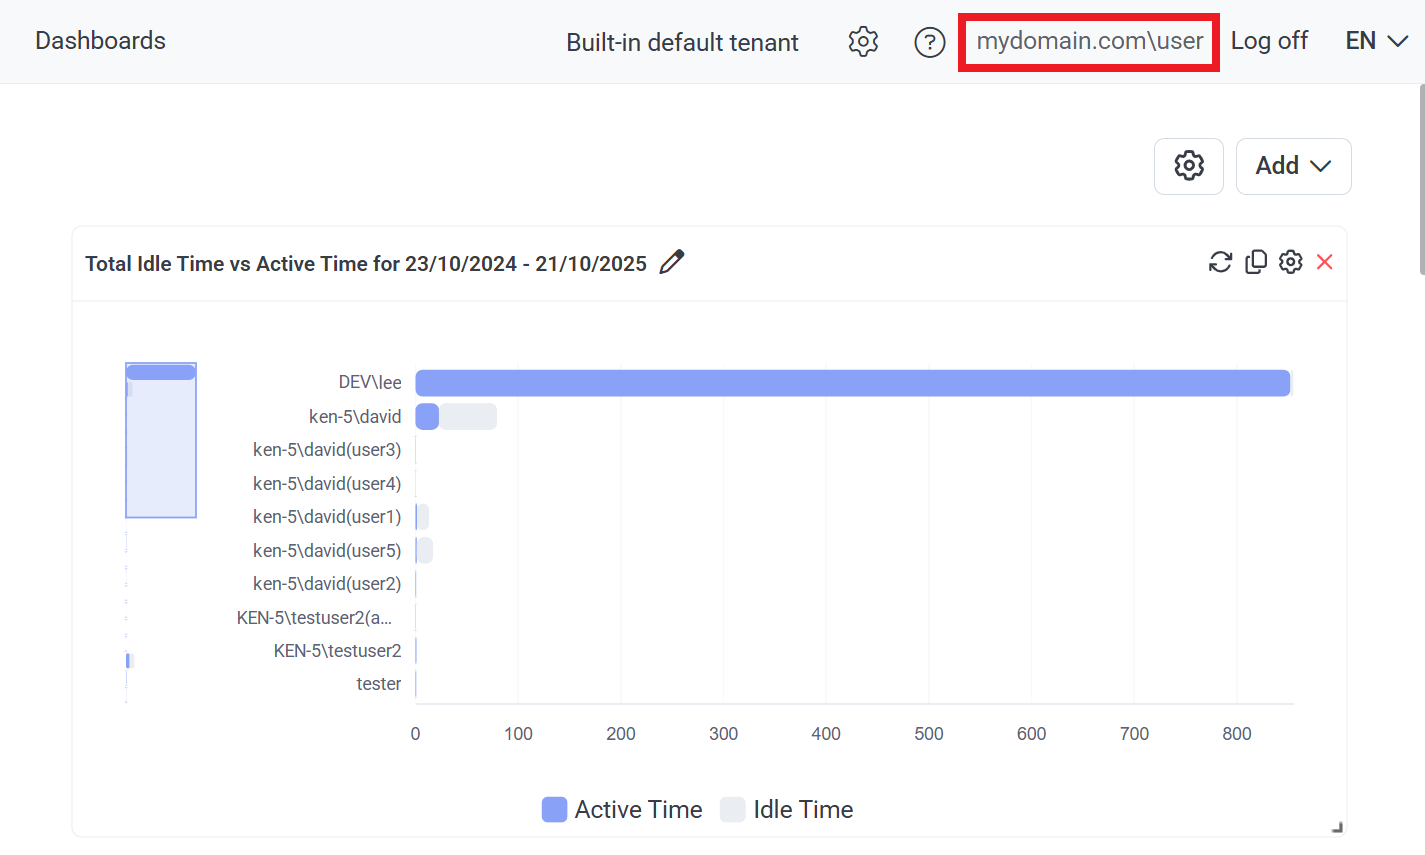
• LDAP Path: LDAP://ldaps.mydomain.com:636/DC=mydomain,DC=com
• Domain NetBIOS Name: mydomain
• User: user@mydomain.com
• Password: The password of the user account.

6.3. Add the new Microsoft Entra ID user to the Management Tool, as follows:
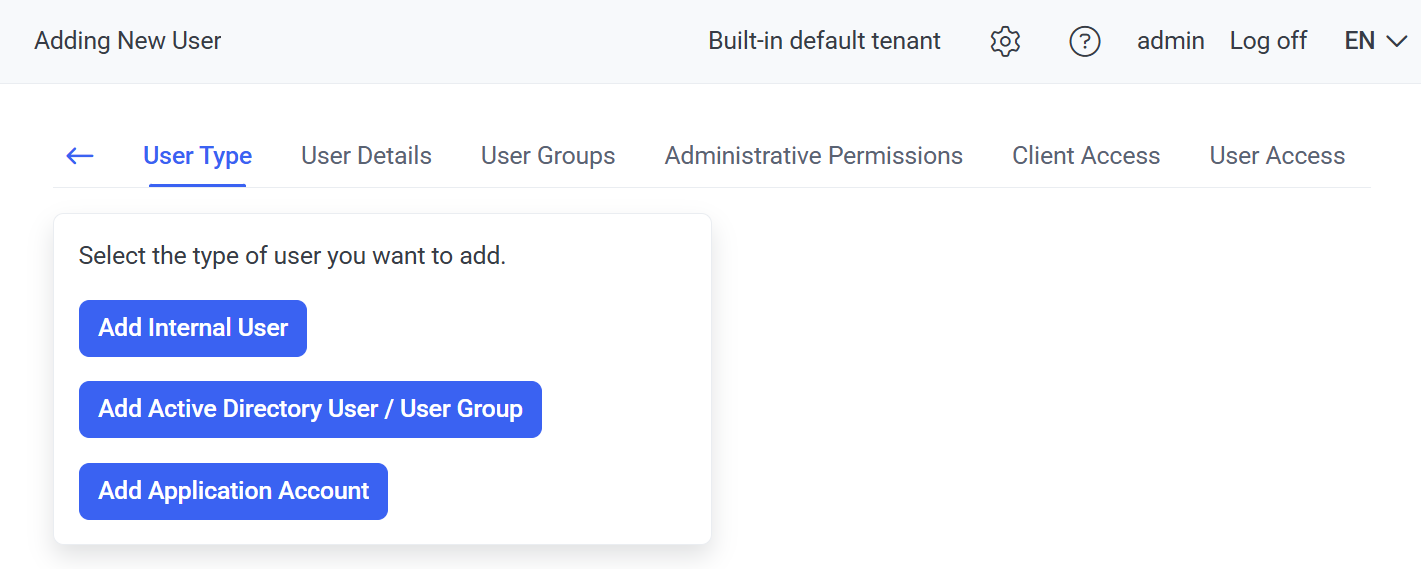
6.3.1. In the Management Tool, open the Users page, and click Add User.
6.3.2. Click the Add Active Directory User / User Group button.
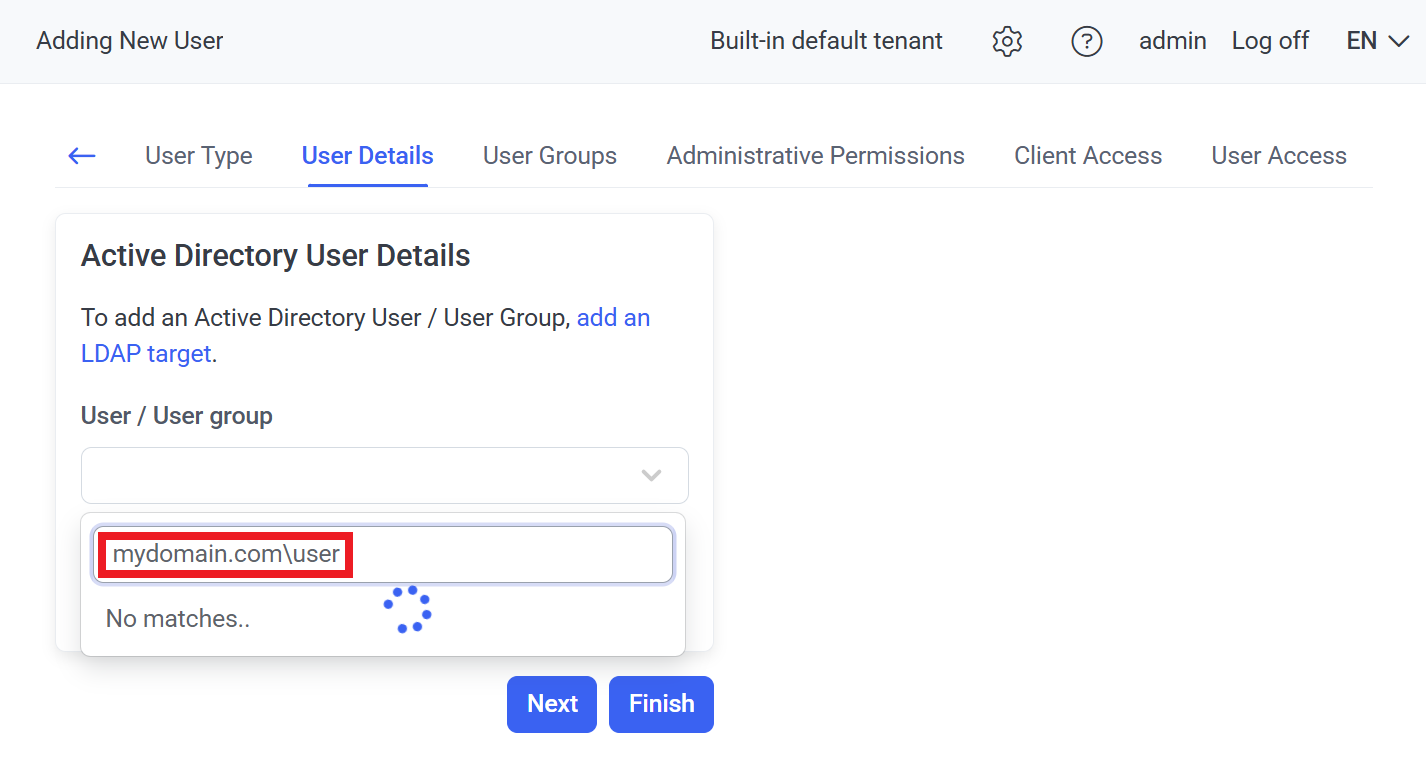
6.3.3. Start entering, and then select, the new Microsoft Entra ID user, and click Next.
6.3.4. Complete adding the user in the usual way (including granting the user at least the administrative Management Tool Access permission).
6.3.5. Check that the new Microsoft Entra ID user added can log in to the Management Tool.